# Encrypting Messages in Outlook
All students, faculty, and staff should have the ability to send encrypted emails. This page details how to encrypt your message and how to view an encrypted message in Outlook.
## Background
Microsoft offers a few different levels of encryption. This is an outline of what the different levels do (all levels are securely encrypted):
- **Encrypt-Only** is the default, it means the message is encrypted in transit and the recipient will have to authenticate with their email to view the message, or use a one-time code sent to their email to authenticate.
- **Do Not Forward** disables the forward option and disables printing. Of course, this doesn’t disable screenshots or the user’s ability to take a picture with their smartphone.
- **Bryn Athyn College – Confidential** means the recipient won’t be able to open the message in a non-Bryn Athyn College/GC Outlook client. This is in case someone is having their work email forwarded to a personal email.
- **Bryn Athyn College – Confidential View Only** is the same as above, only the content cannot be modified or replied to.
If you wish to send an encrypted message, we recommend setting up the encryption before writing your message. That way, if you accidentally send the message before you are done typing it, it will still be encrypted. Additionally, you can send this link from Microsoft that explains how end users can open a protected message: [https://support.office.com/en-us/article/how-do-i-open-a-protected-message-1157a286-8ecc-4b1e-ac43-2a608fbf3098](https://support.office.com/en-us/article/how-do-i-open-a-protected-message-1157a286-8ecc-4b1e-ac43-2a608fbf3098)
## Instructions
These instructions were created with the Outlook desktop app. If you're encrypting on the Outlook web version, the instructions remain the same, although the buttons may look slightly different.
1. Create a new email. In that email select the Options tab at the top. [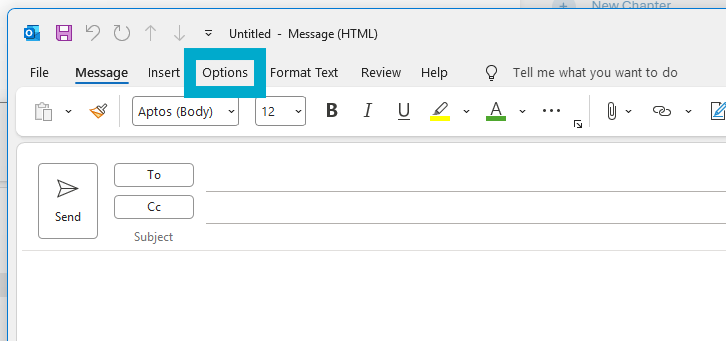](https://helpdesk.brynathyn.edu/uploads/images/gallery/2026-06/aKGimage.png)
2. Select **Encrypt**.
[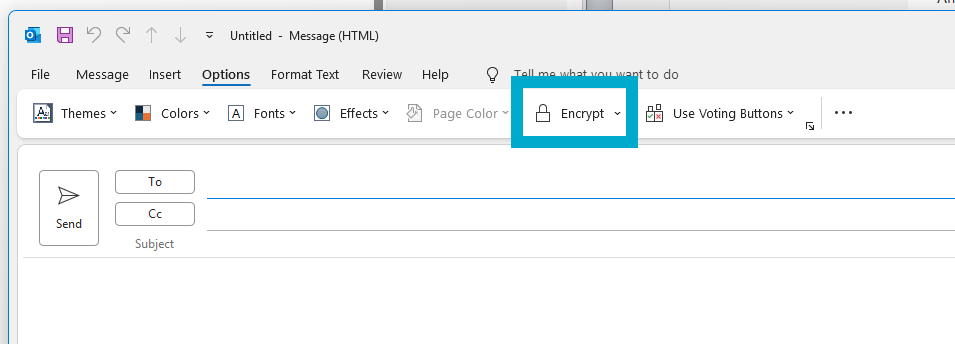](https://helpdesk.brynathyn.edu/uploads/images/gallery/2026-06/bxximage.png)
3. Optionally, choose your encryption level from the drop-down menu.
[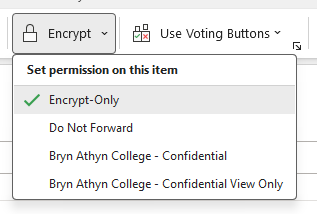](https://helpdesk.brynathyn.edu/uploads/images/gallery/2026-06/iDCimage.png)You may have to click **Encrypt** first for the dropdown to appear correctly if this is your first time encrypting a message.
4. Write and send your message!
## Viewing
For anyone with a Bryn Athyn College email, viewing an encrypted email will be the same as opening any other email. If you’re sending an encrypted email to someone outside of Bryn Athyn College, like to a Gmail address, the recipient must go through the Microsoft Purview portal to read it:
- Locate the email.
[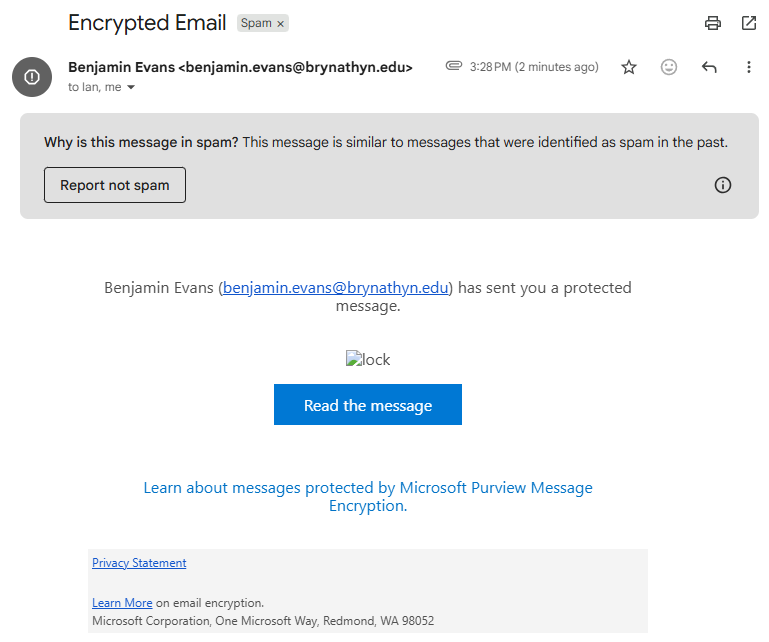](https://helpdesk.brynathyn.edu/uploads/images/gallery/2026-06/rY4image.png)When received, it may automatically go into the recipient's spam folder.
- Once the recipient clicks on **Read the message**, they will be taken to a login page.
- Here they can either log in with their personal email account (e.g. `@gmail.com`), or use the **One-time passcode** option to sign in.
[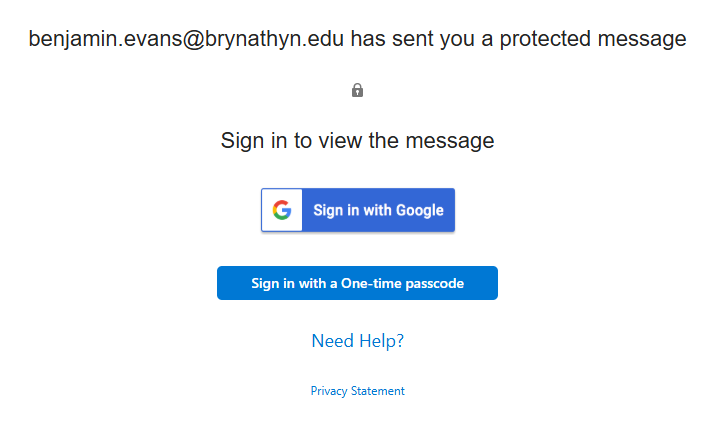](https://helpdesk.brynathyn.edu/uploads/images/gallery/2026-06/zoNimage.png)
They will then be able to view the contents of the message.