Software
Setting Up and Using Microsoft 365 and other Miscellaneous Software
- Microsoft 365
- Installing Microsoft 365
- Setting up OneDrive
- Meeting on Teams
- Setting up Outlook on Mobile
- Encrypting Messages in Outlook
- Reporting Messages in Outlook
- Cybersecurity
- Accessing the Library's Electronic Resources
- Recovering Deleted Data
- Vonage Support Resources
Microsoft 365
Installing Microsoft 365
All students, faculty and staff are assigned a license to the Microsoft 365 suite of apps.
- Microsoft 365 apps can be accessed via the web at m365.cloud.microsoft/apps.
- The desktop version of Microsoft 365 apps offer more features and can be installed with the instructions in the Desktop Apps section.
- You can install Microsoft 365 apps on your Android or iOS device with the links in the Mobile Apps section.
Web Apps
The Microsoft 365 web apps offer a convenient way to use Microsoft 365 in your browser.
Microsoft 365 web apps are found at m365.cloud.microsoft/apps.
Desktop Apps
Desktop apps for Microsoft 365 offer the most robust features and are installed via the instructions below.
Windows
- Head to m365.cloud.microsoft/apps.
- Sign in with your campus username and password.
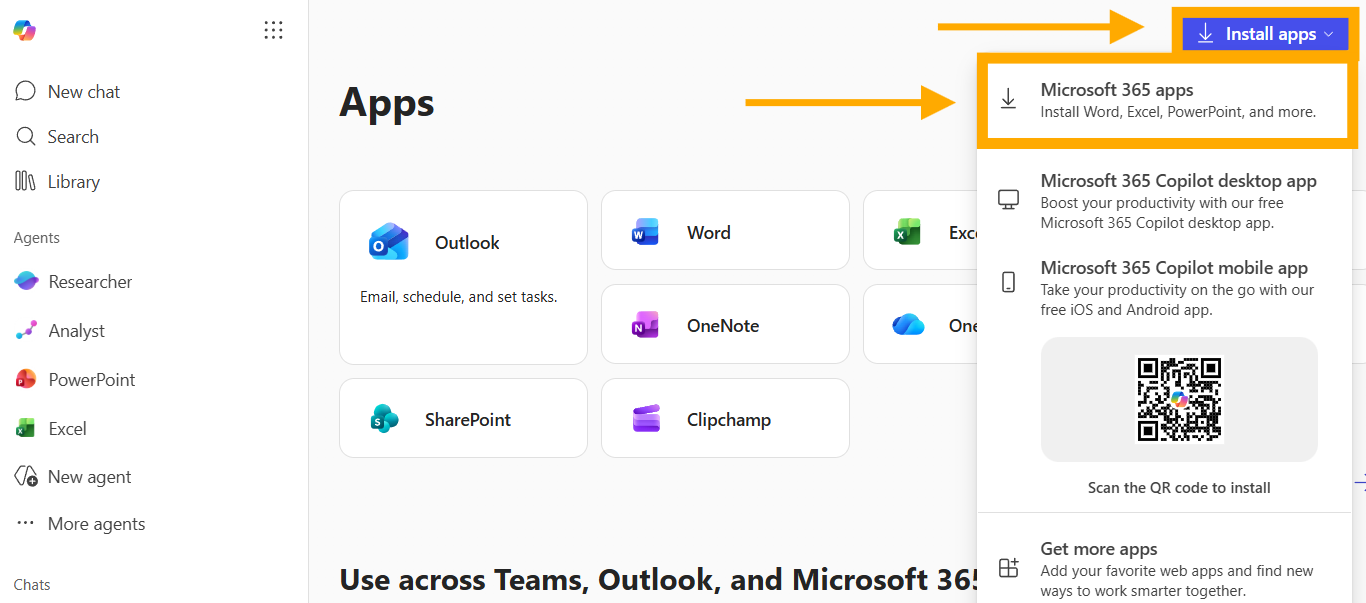
- Click the Install apps dropdown then Microsoft 365 apps.

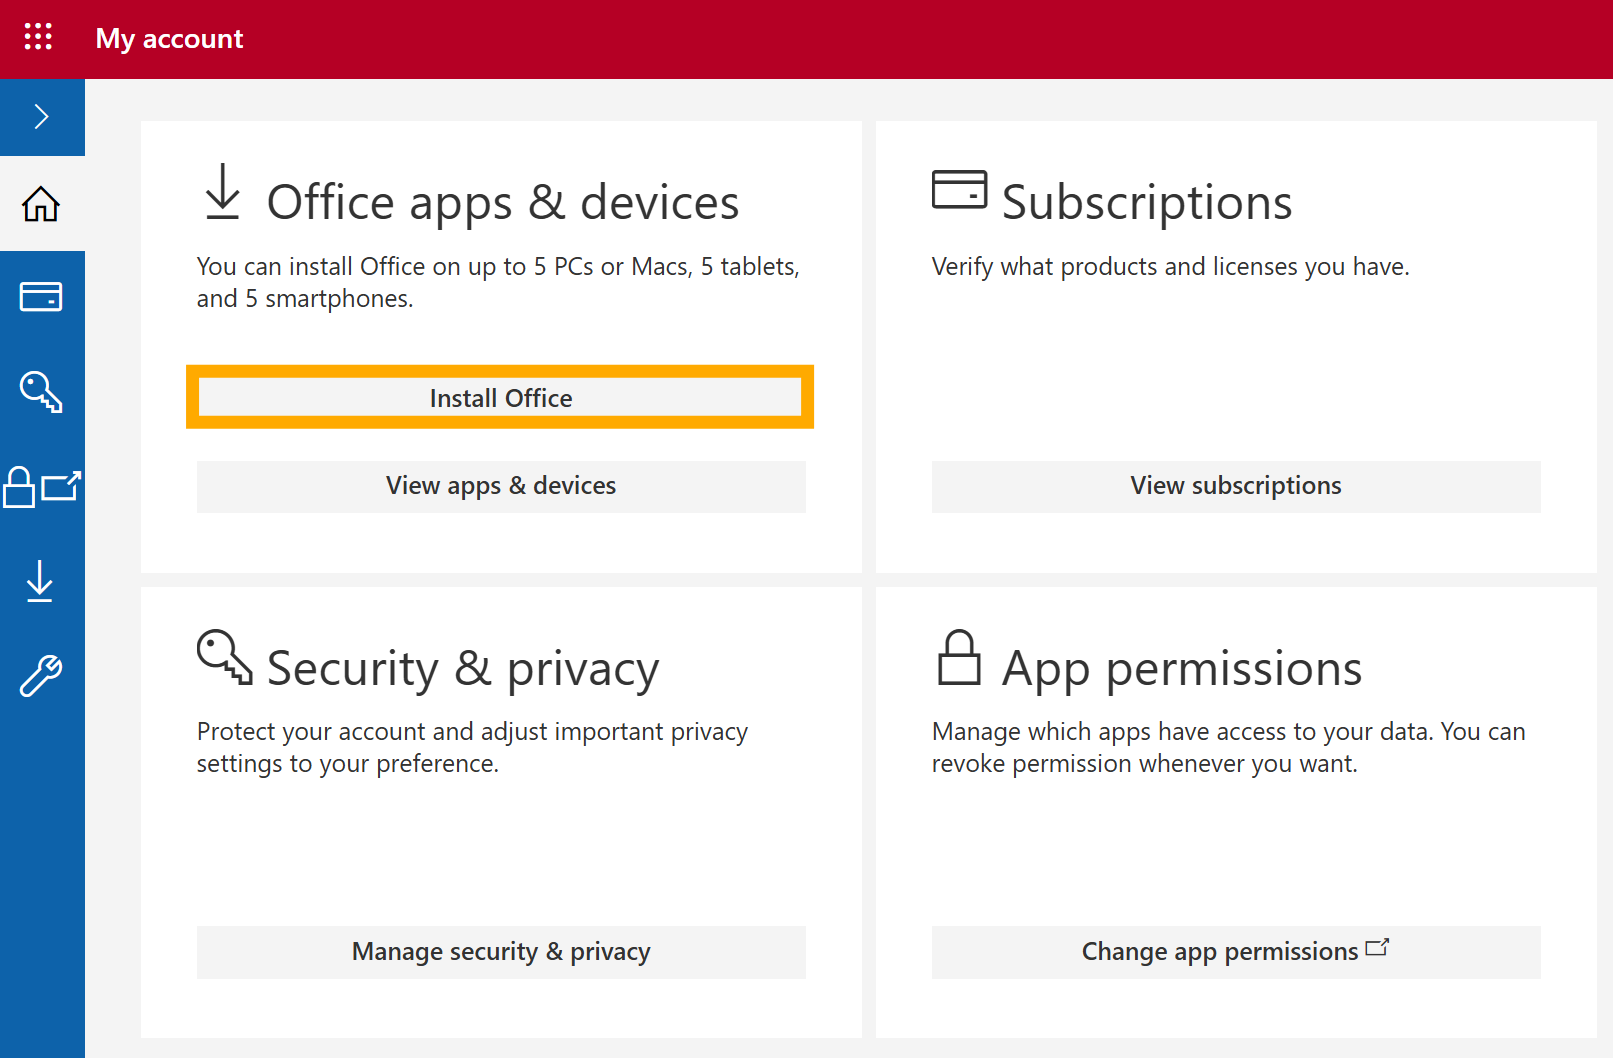
- Click Install Office to download the installer.

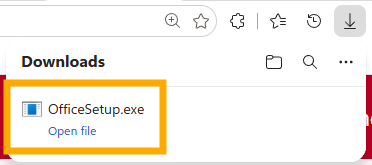
- Open the OfficeSetup.exe installer that just downloaded.

- If prompted, allow the installer to run by clicking Yes on the User Account Control popup.
- College-owned computers will require administrator credentials to continue.
The installer will download and install the Microsoft 365 desktop apps.
macOS
- Head to m365.cloud.microsoft/apps.
- Sign in with your campus username and password.
- Click the Install apps dropdown then Microsoft 365 apps.
- Click Install Office to download the installer.
- Wait for the download to complete.
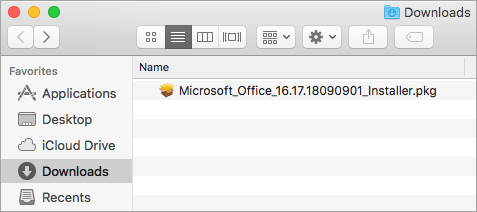
- Open Finder.
- Go to Downloads.
- Double-click Microsoft_365_and_Office_BusinessPro_Installer.pkg file.
File name will vary between Office versions.
If you see an error that says the Microsoft Office installer.pkg can't be opened because it is from an unidentified developer, wait 10 seconds and move the downloaded file to your desktop. Hold Control + click the file to launch the installer.
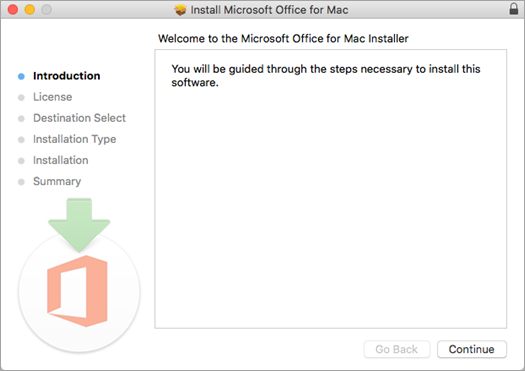
- On the first installation screen, select Continue to begin the installation process.

- Review the software license agreement, and then click Continue.
- Review the software license agreement, and then click Continue.
- Select Agree to agree to the terms of the software license agreement.
- Choose how you want to install Microsoft 365 and click Continue.
- Review the disk space requirements or change your install location, and then click Install.
If you want to only install specific Microsoft 365 apps and not the entire suite, click the Customize button and uncheck the programs you don't want.
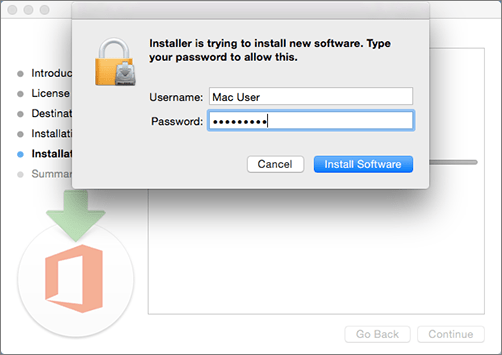
- Enter your Mac login password, if prompted, and then click Install Software.
This is the password that you use to log in to your Mac.
The software begins to install. Click Close when the installation is finished.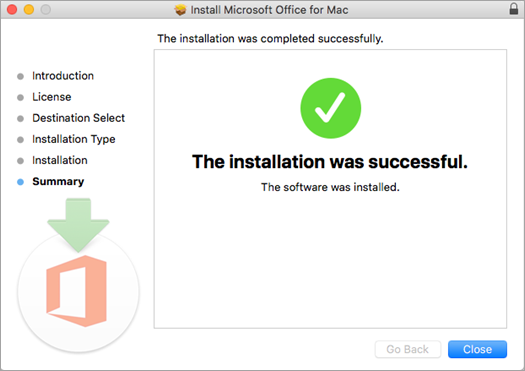
Mobile Apps
Android
Microsoft 365 apps can be downloaded on Android devices via the Google Play Store
Setting up OneDrive
Microsoft OneDrive is a cloud storage solution available for everyone at Bryn Athyn College.
- With OneDrive, you can sync files between your computer and the cloud, so you can get to your files from anywhere—your computer, your mobile device, or through the OneDrive website at OneDrive.com.
- If you add, change, or delete a file or folder in your OneDrive folder, the file or folder is added, changed, or deleted on the OneDrive website and vice versa.
- You can work with your synced files directly in File Explorer in Windows or Finder in macOS. Whenever you’re online, any changes that you or others make will sync automatically. Once synced, you can access your files even when you’re offline.
Installation
Windows
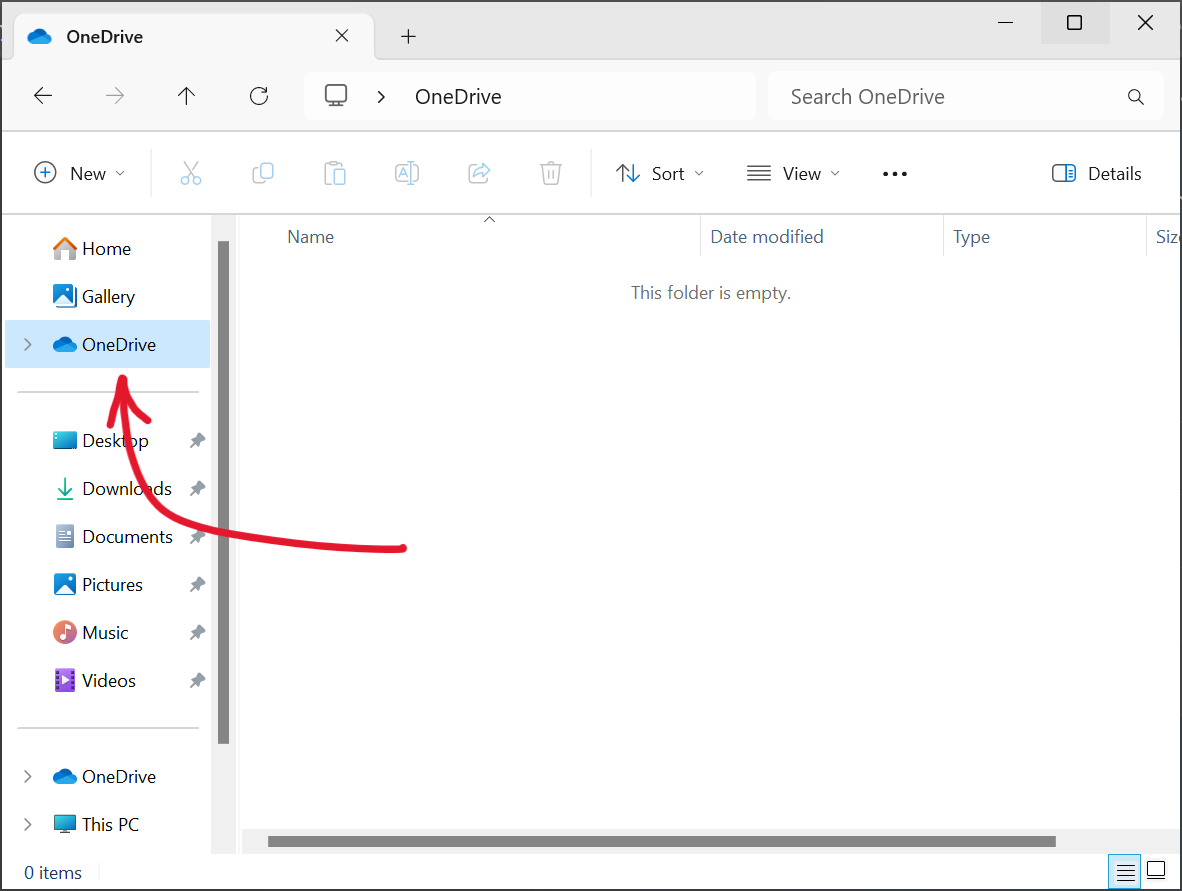
- OneDrive is pre-installed with Windows 11. You can find it by opening File Explorer and clicking the OneDrive folder on the left pane.

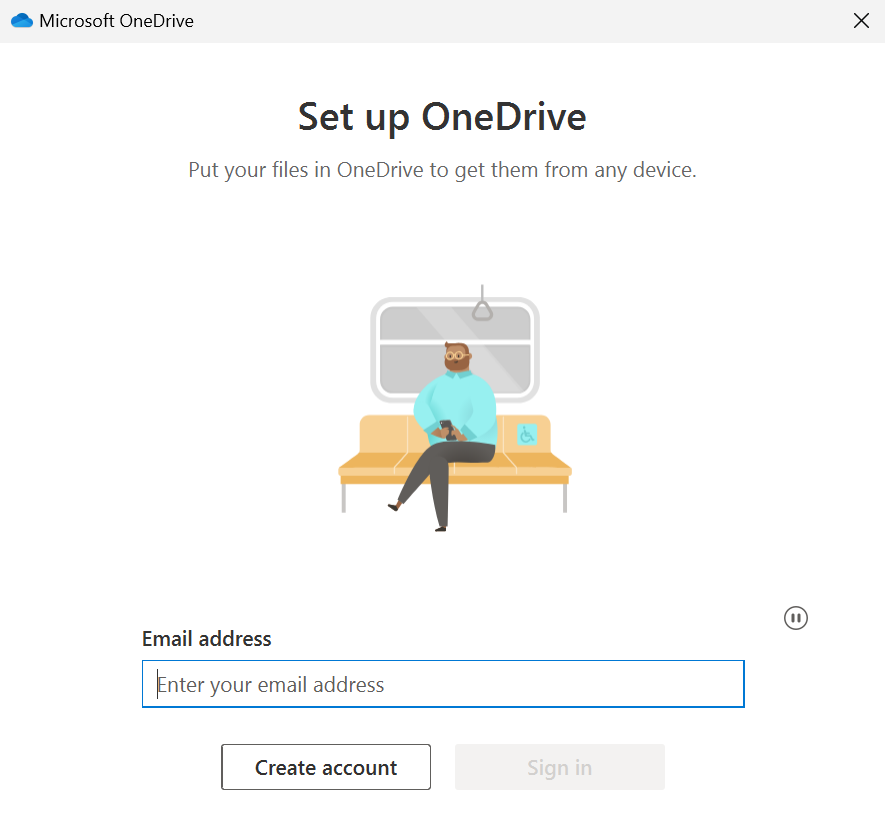
- If OneDrive has not been set up yet, you will be prompted to enter your email.

- Use your Bryn Athyn College Microsoft 365 credentials to sign in.
What is my Username and Password?
- Use your Bryn Athyn College Microsoft 365 credentials to sign in.
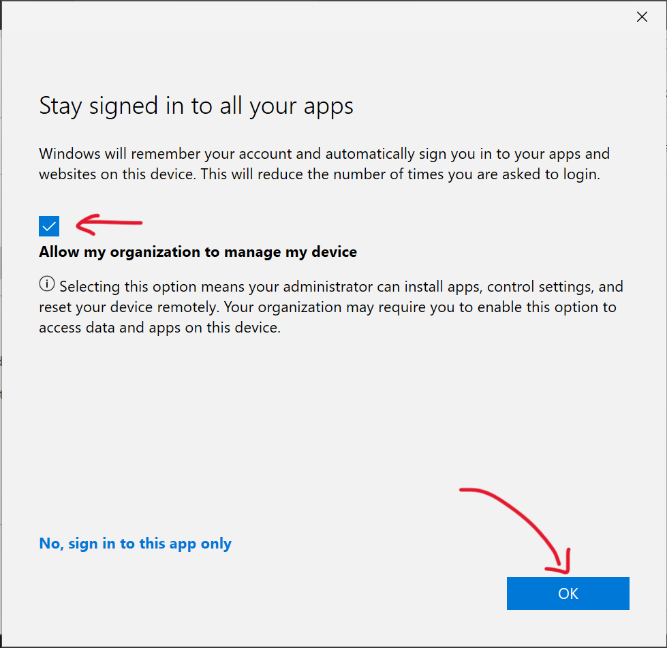
- Keep Allow my organization to manage my device checked, then click OK.

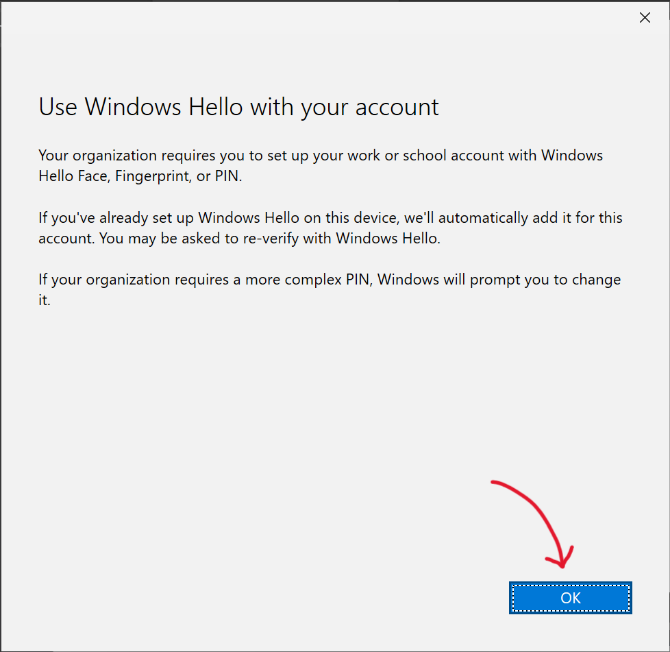
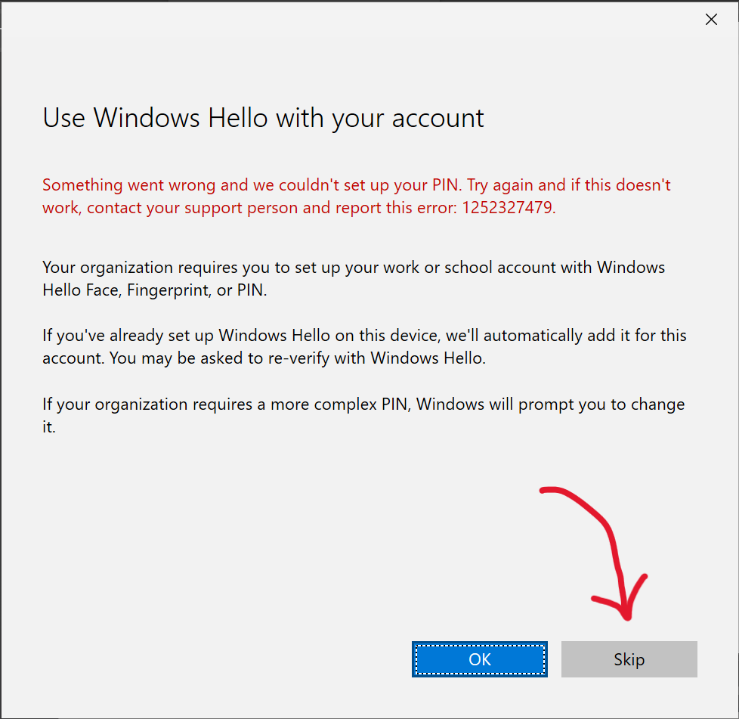
- When prompted to use Windows Hello, click OK.

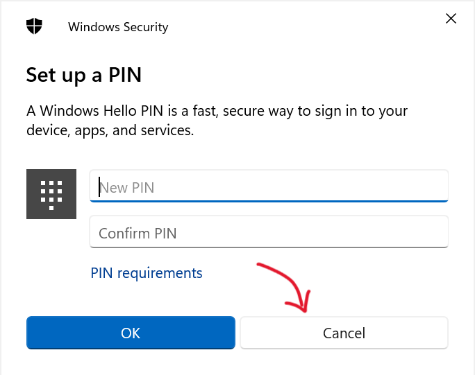
- If you're asked to set up a PIN, press Cancel.

- Click Skip.

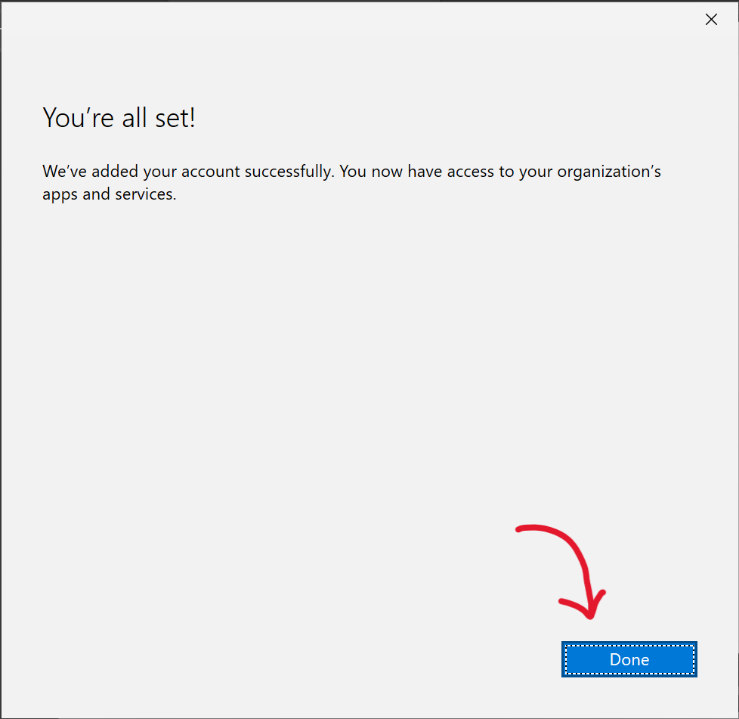
- Click Done.

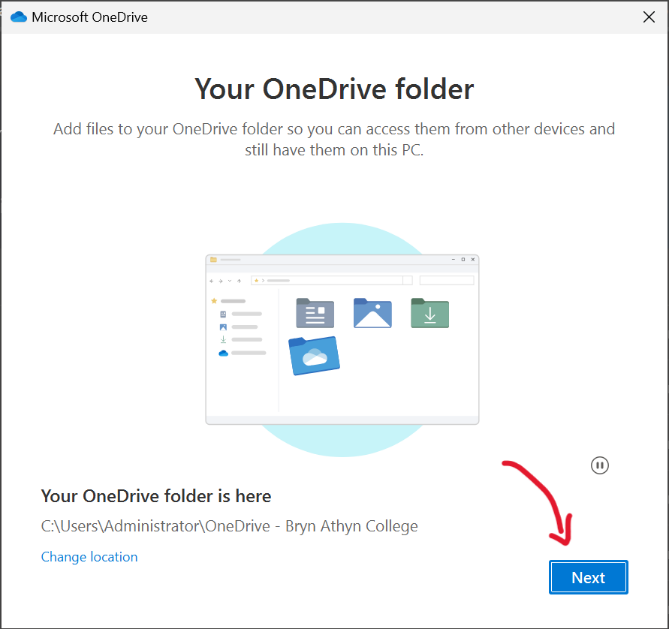
- Click Next.

- Once you reach the Back up folders on this PC screen, press the 𐌗 in the top right corner to close the window.

If you're on a College-owned device, you will see an error that says
"Your IT Administrator has set up a policy that prevents changes to known folders."
This error can be safely ignored.

OneDrive is now set up.
If you use more than one account, your personal files appear under OneDrive – Personal and your work or school files appear under OneDrive – Bryn Athyn College.
macOS
- Download and install OneDrive for your computer from
microsoft.com/microsoft-365/onedrive/download - Start OneDrive Setup by pressing
cmd+Spaceto launch a Spotlight query and type "OneDrive". When prompted, enter your Bryn Athyn College Microsoft 365 account, and select Sign in.The OneDrive Sync app for macOS does not currently support adding two business accounts from different organizations if they share the same display name. Attempting to configure such accounts will result in a setup failure.
- There are a couple of points of OneDrive Setup that are helpful to watch for:
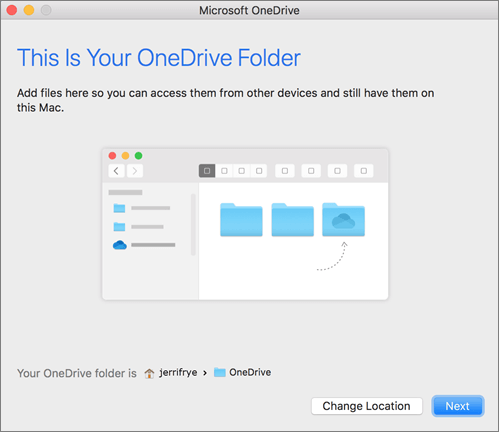
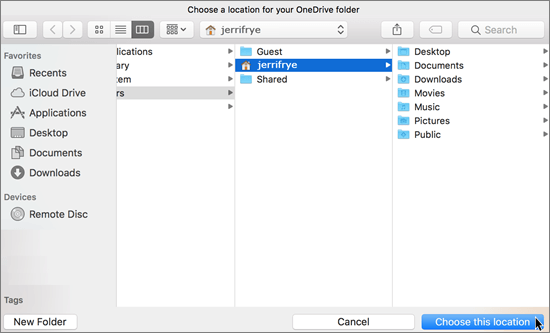
- When setting up your OneDrive, it has a default location set. However, you can change this during setup. On the This is your OneDrive Folder screen, click Change Location.

Select a location where you would like to save your OneDrive files and click Choose this location.
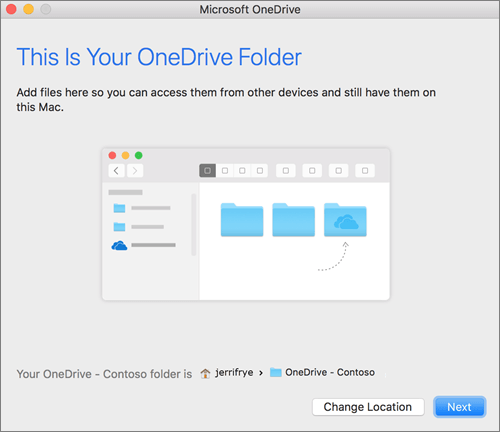
When you see the This is your OneDrive Folder screen, you'll now see a path to the folder you selected. Click Next to continue.
- On the Sync Files from Your OneDrive screen, you can choose the folders you want to sync to your computer and click Next. This conserves space on your computer, and reduces bandwidth needed for the sync processes.
- When setting up your OneDrive, it has a default location set. However, you can change this during setup. On the This is your OneDrive Folder screen, click Change Location.
- Once sync has completed, you can:
- Add another account. You can have multiple work or school accounts, but only one Personal OneDrive account. Learn more.
- Add Finder integration. If you're on OSX 10.10 or higher, get sync status directly from Finder by enabling Finder overlays in Settings.
- First, click the Apple logo in the top left corner of your Mac Desktop and select System Preferences.
- Select Extensions in the top-level menu.
- Toggle on the OneDrive Finder Integration to enable Finder overlays.
You're all set! Click Open my OneDrive folder to see your files sync to your folder.
If you use more than one account, your personal files appear under OneDrive – Personal and your work or school files appear under OneDrive – Bryn Athyn College.
Android
You can download OneDrive on an Android device via the Google Play Store.
iOS
You can download OneDrive on an iPhone via the Apple App Store.
Meeting on Teams
When scheduling a Teams meeting, you are given a variety of options. This page contains instructions for how to set up different kinds of Teams meetings.
Scheduling
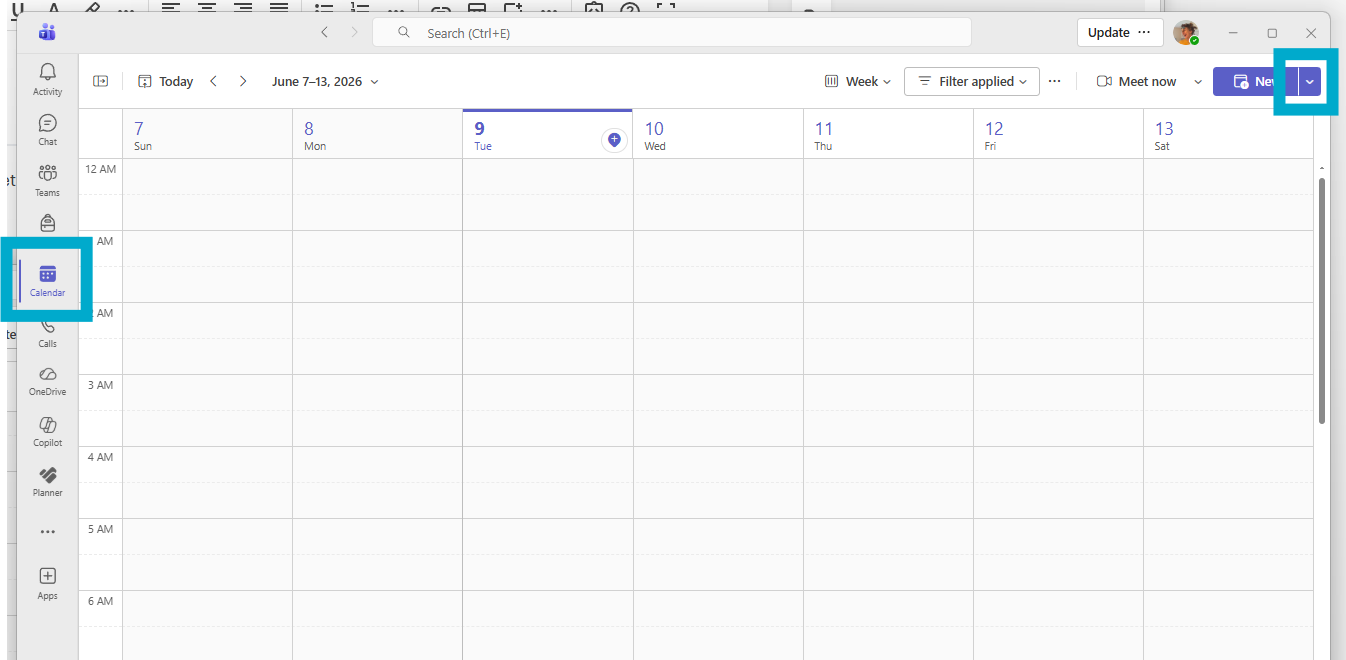
- Select the Calendar view.
- Select the drop-down arrow in the top right.

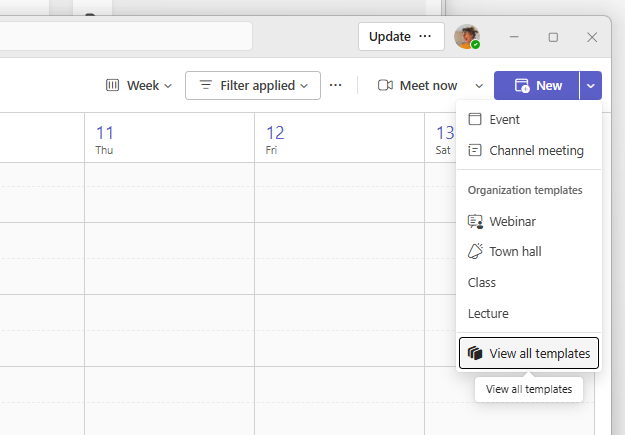
- Pick a template to use.

- View all templates will show the full list. Each is described in the section below.
- Fill in the rest of the basic information about the meeting (location, time, attendees, etc.), then send the invite.
Types
Channel Meeting
Choosing Channel meeting will create a basic Teams meeting where participants can discuss with each other. This is the best option for one-on-one or group conversations.
Live Event and Town Hall
Live Events and Town Halls support a massive number of viewers connecting to watch content live from the host. Viewer participation is under the control of meeting organizers for managed Q&A and similar interaction. These are best suited to public presentations. The main difference is that in Town Halls participants are strictly limited to no microphone or camera, whereas in Live Events input permissions can be changed.
Webinar
Webinars are similar to live events, but have advanced features both for pre-registering attendees, and for managing multiple presenters. This is ideal for when presenters are attending from multiple locations.
Lecture and Class
Lectures and Classes are very similar to meetings, but have a few additional options to limit which participants can present, use their mics, text chat, etc. The only difference between the two is that classes have chat set to only during the meeting, whereas lectures default to having the chat available outside the meeting.
Setting up Outlook on Mobile
If you forget your email address and/or password, see What is my Username and Password?
- Scan a QR code to download the Outlook app from the Apple App Store or Google Play Store.


- Tap Add Account.
- Enter your college email address.
- Select Office 365 as your account type or email provider.
- Enter your Microsoft account password, then click Sign in.
- Approve your sign in request via Authenticator when prompted.


You now have access to your college email on the go!
Encrypting Messages in Outlook
All students, faculty, and staff should have the ability to send encrypted emails. This page details how to encrypt your message and how to view an encrypted message in Outlook.
Background
Microsoft offers a few different levels of encryption. This is an outline of what the different levels do (all levels are securely encrypted):
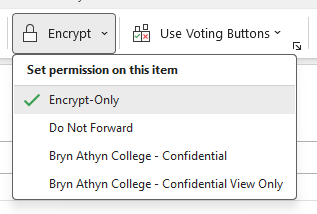
- Encrypt-Only is the default, it means the message is encrypted in transit and the recipient will have to authenticate with their email to view the message, or use a one-time code sent to their email to authenticate.
- Do Not Forward disables the forward option and disables printing. Of course, this doesn’t disable screenshots or the user’s ability to take a picture with their smartphone.
- Bryn Athyn College – Confidential means the recipient won’t be able to open the message in a non-Bryn Athyn College/GC Outlook client. This is in case someone is having their work email forwarded to a personal email.
- Bryn Athyn College – Confidential View Only is the same as above, only the content cannot be modified or replied to.
If you wish to send an encrypted message, we recommend setting up the encryption before writing your message. That way, if you accidentally send the message before you are done typing it, it will still be encrypted. Additionally, you can send this link from Microsoft that explains how end users can open a protected message: https://support.office.com/en-us/article/how-do-i-open-a-protected-message-1157a286-8ecc-4b1e-ac43-2a608fbf3098
Instructions
These instructions were created with the Outlook desktop app. If you're encrypting on the Outlook web version, the instructions remain the same, although the buttons may look slightly different.
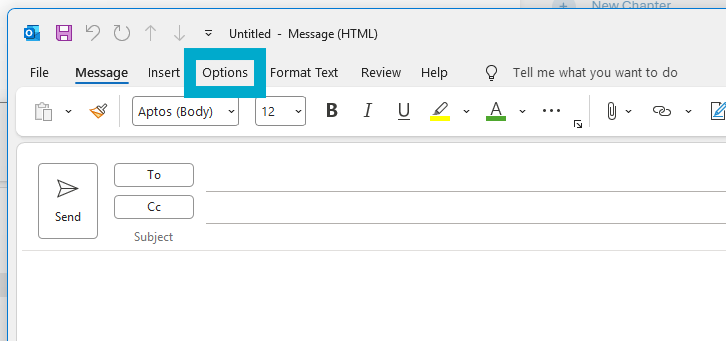
- Create a new email. In that email select the Options tab at the top.

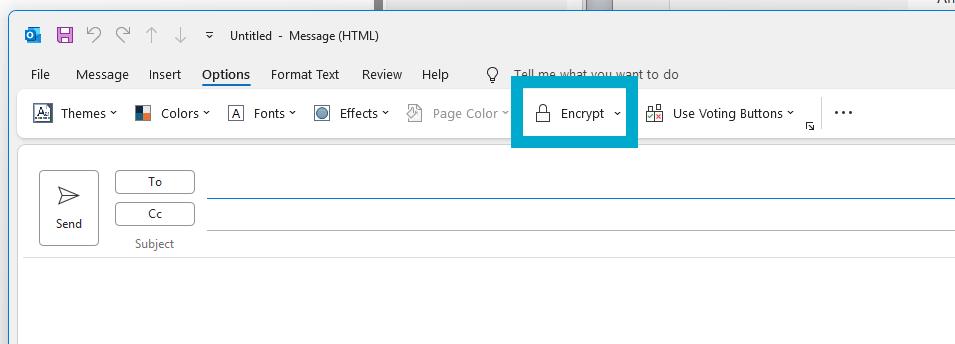
- Select Encrypt.

- Optionally, choose your encryption level from the drop-down menu.

You may have to click Encrypt first for the dropdown to appear correctly if this is your first time encrypting a message.
- Write and send your message!
Viewing
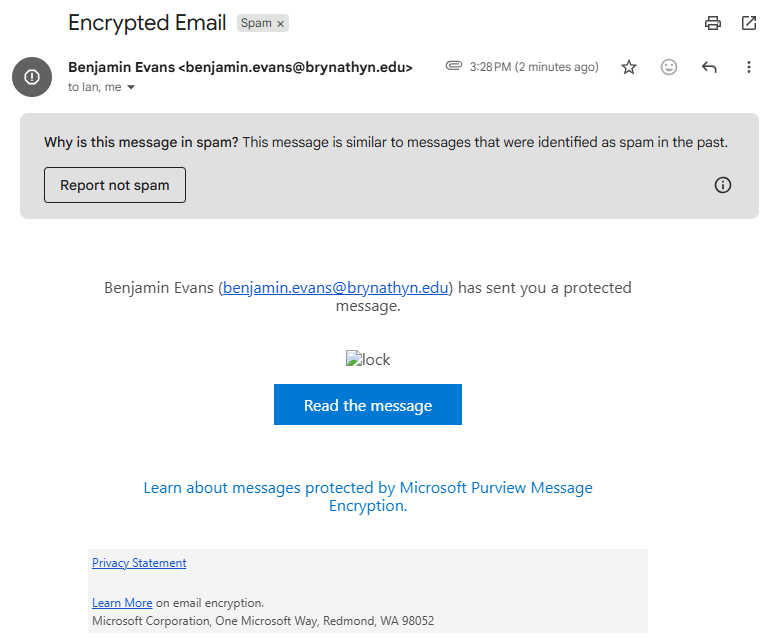
For anyone with a Bryn Athyn College email, viewing an encrypted email will be the same as opening any other email. If you’re sending an encrypted email to someone outside of Bryn Athyn College, like to a Gmail address, the recipient must go through the Microsoft Purview portal to read it:
- Locate the email.

When received, it may automatically go into the recipient's spam folder.
- Once the recipient clicks on Read the message, they will be taken to a login page.
- Here they can either log in with their personal email account (e.g.
<name>@gmail.com), or use the One-time passcode option to sign in.
- Here they can either log in with their personal email account (e.g.
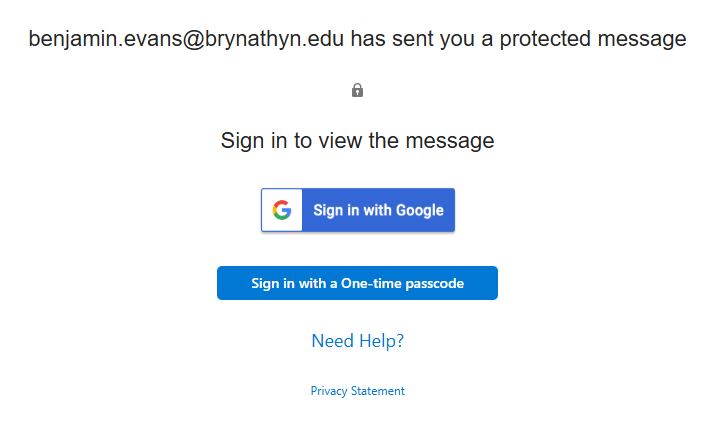
They will then be able to view the contents of the message.
Reporting Messages in Outlook
Use the Report Message drop down to select from a couple ways to deal with phishing or junk mail. These features help Microsoft keep your information safe and your inbox filled with only important emails.
Instructions
The screenshots below will match the Outlook website and the modern version of the desktop app. If you use the old version (Outlook Classic) on your desktop, the buttons may be in different locations.
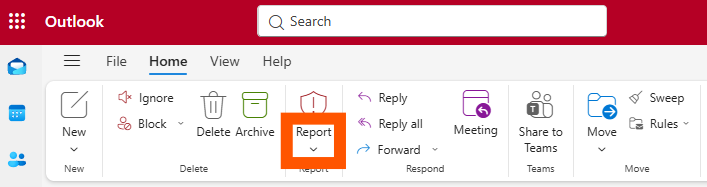
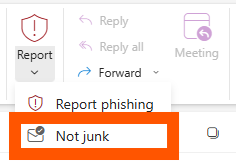
- In the Home tab, click the Report button with the dropdown arrow.

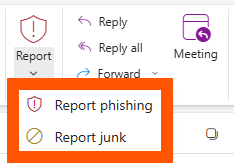
- With the message you want to report highlighted, click Report junk or Report Phishing. See Junk and Phishing at the bottom of this page if you don't know which to select.

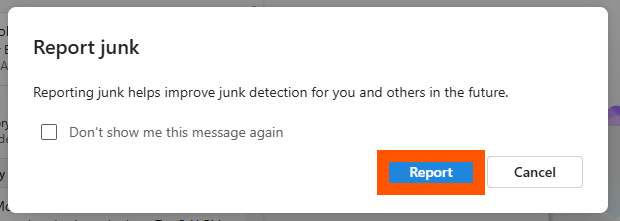
- Click Report to confirm.

- The message will be moved to your Junk Email folder. After 30 days there, it will be deleted.
When you report a message, a copy will be sent to Microsoft to update spam filters, and all future messages from that sender will be sent directly to the Junk Email folder.
If you reported a message accidentally and wish to restore it:
- Find the message in your Junk Email folder and select it.
- Click the Report dropdown.
- Click Not junk.

Junk
These are messages that you don't want to receive. For example, they may be advertisements you don't care about or find offensive. Junk emails are annoying, but not necessarily malicious.
Phishing
Phishing is the practice of luring you into disclosing personal information, such as bank account numbers and passwords. Often phishing messages look legitimate but have deceptive links that open fake websites. Phishing emails are always malicious, but not necessarily annoying.
Cybersecurity
Encrypting your Computer
Users with personal devices have a responsibility to ensure that their devices connected to the BAC Network are encrypted. College owned devices set up by Helpdesk will be encrypted during setup. This page has instructions for encrypting personal devices.
Windows
Pro / Education / Enterprise Edition
PRIOR TO ENCRYPTION: Device encryption requires the creation of a recovery key. If you are ever unable to log onto your device or your computer needs replacement, you will NOT be able to recover data from your disk without this recovery key. It is recommended you save it in multiple secure locations for future use. Helpdesk is not responsible for the storage of your recovery keys.
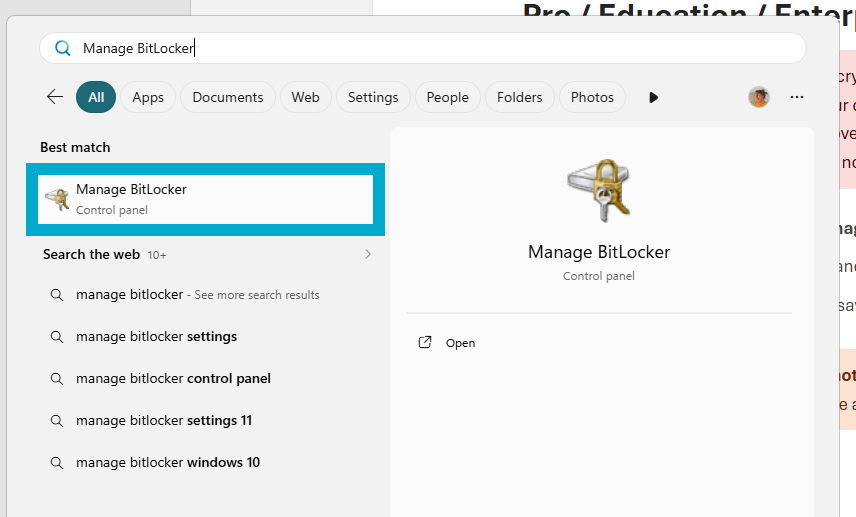
- Open the Start Menu and search Manage BitLocker.

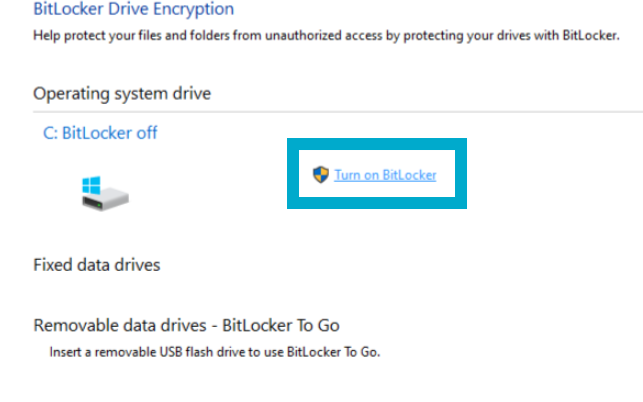
- Select the drive you want to encrypt and press Turn on BitLocker.

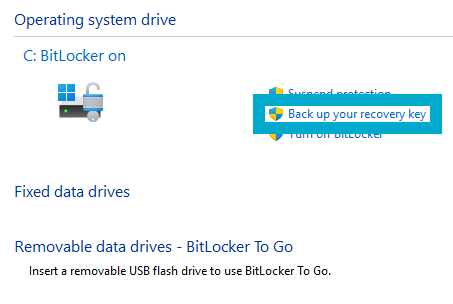
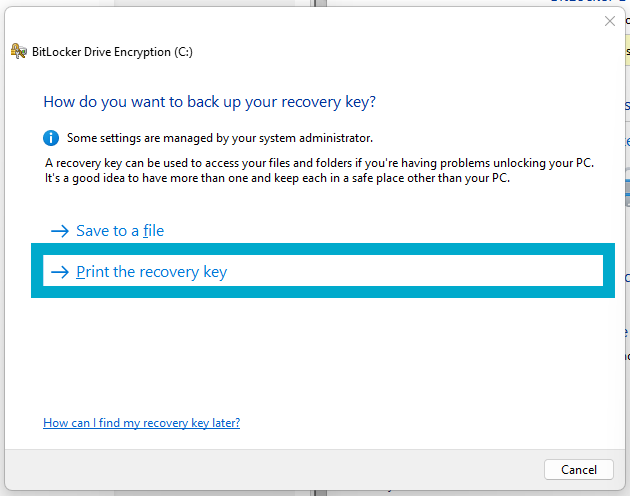
- Click Back up your recovery key.

- Click Print the recovery key.

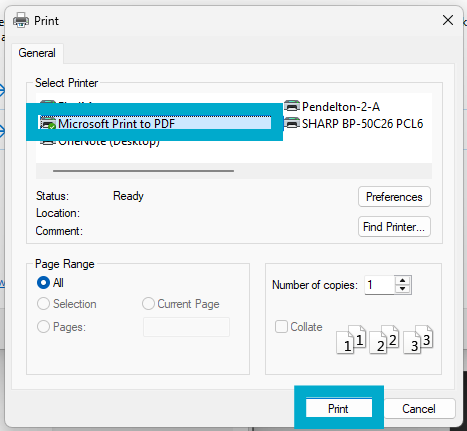
- Click Microsoft Print to PDF, then click Print.

It is important that the PDF created is not saved locally. If BitLocker triggers and locks your encrypted drives, you will not be able to access any local files.
- Click Encrypt entire device.
- Select New encryption mode.
- Restart your computer.
Home Edition
Windows Home uses BitLocker, however the user interface is significantly simplified. See this guide for instructions on how to encrypt your Windows Home device.
MacOS
- Go to System Preferences.
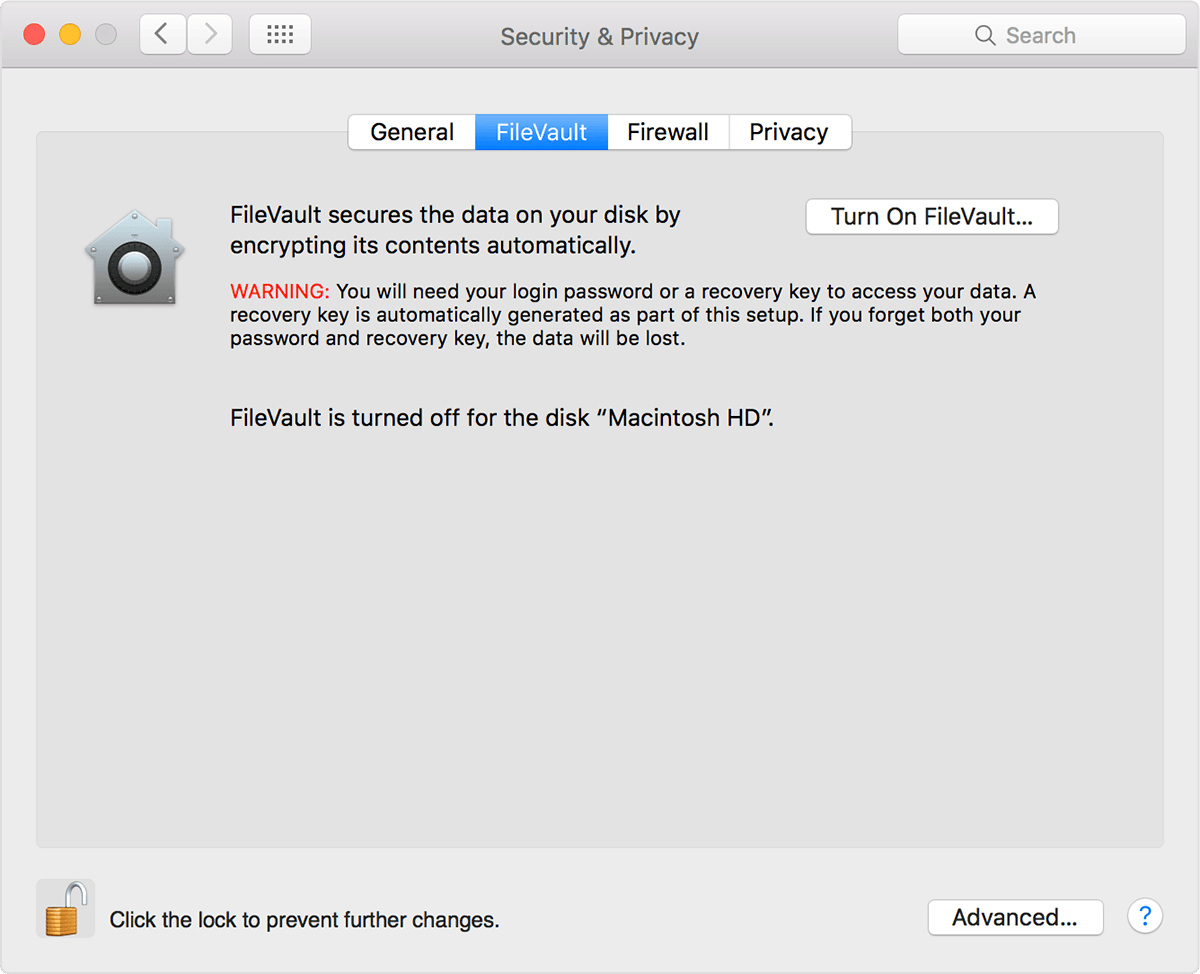
- Open Security & Privacy.
- Choose the tab FileVault and authenticate by clicking on the padlock in the bottom left corner.

- Click Turn on FileVault.
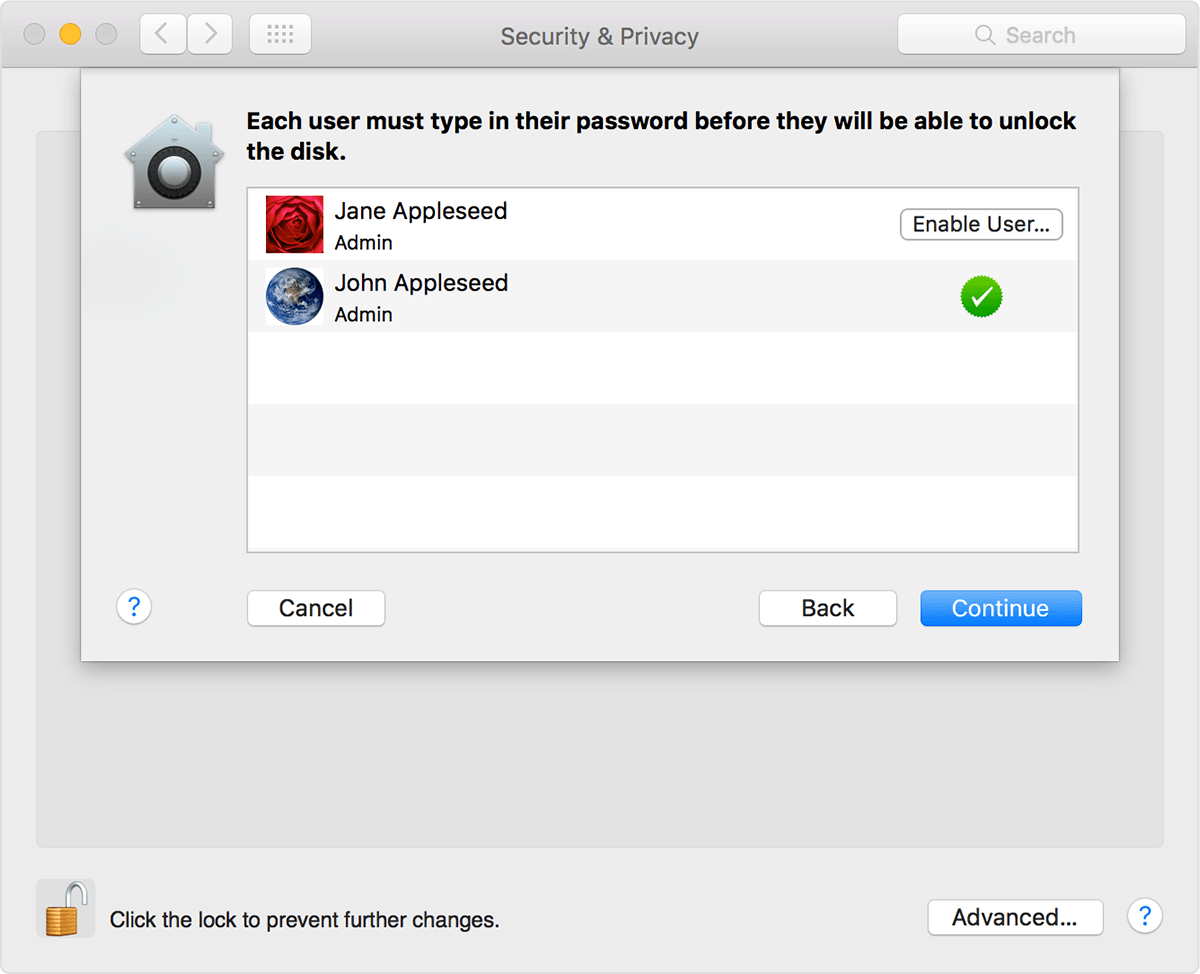
- Select the user(s).

- Write down/take picture of the recovery key.
If you forget your password, you will need this key to access your files.
- Apple can also store they key, in case you lose your password and all other backups.
- Restart your computer.
Setting up Antivirus
The college requires that you use an Antivirus on devices you use to access college data. This includes laptops used for work or school, as well as occasionally personal desktops and mobile devices. Our antivirus recommendations are sorted by operating system below.
Windows
- College Owned
- Any Windows machine purchased/owned by the college, should be protected using Microsoft Defender 365.
- This is a program that must be installed by the Helpdesk, so if you don’t think your device is protected, please contact the Helpdesk immediately.
- Personal
- Employee work use
- Personal Windows machines that are being used for work should be onboarded to Microsoft Defender 365 by Helpdesk.
- Please contact the Helpdesk to get this set up on your device.
- Non-work use
- Personal Windows machines not used for work related purposes can be protected with the built-in Microsoft Defender.
- Employee work use
MacOS
- College Owned
- Any Mac machine purchased/owned by the college requires Microsoft Defender 365.
- This is a program that must be installed by the Helpdesk, so if you don’t think your device is protected, please contact the Helpdesk immediately.
- Personal
- Employee work use
- Personal Mac devices require an antivirus solution to be installed for protection.
- If this is a personal device used for work, Helpdesk will set up Microsoft Defender 365 on it. Please notify the Helpdesk if you have a personal Mac used for work purposes that doesn’t have Defender on it yet.
- Non-work use
- For a free antivirus solution for Mac, the Helpdesk recommends Malwarebytes https://www.malwarebytes.com/mwb-download It is important to note that the free version of Malwarebytes does not offer automatic antivirus scanning. Scans must be run manually.
- For a paid antivirus, the Helpdesk’s current recommendation is Bitdefender for Mac. It costs $40 a year and offers: active online protection, adware blocking, ability to add extra protection to important files, and Time Machine protections, which helps secure your backups. https://www.bitdefender.com/solutions/antivirus-for-mac.html#plans
- Employee work use
Linux
Linux machines and their recommendations will depend upon the Linux distribution that is being used. Please contact the Helpdesk for additional information if you use a Linux device.
iOS & Android
If you use a mobile device to access company information, it must have an antivirus solution installed on it.
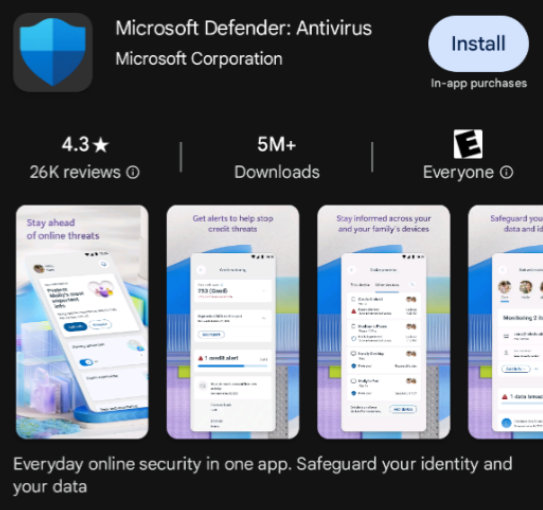
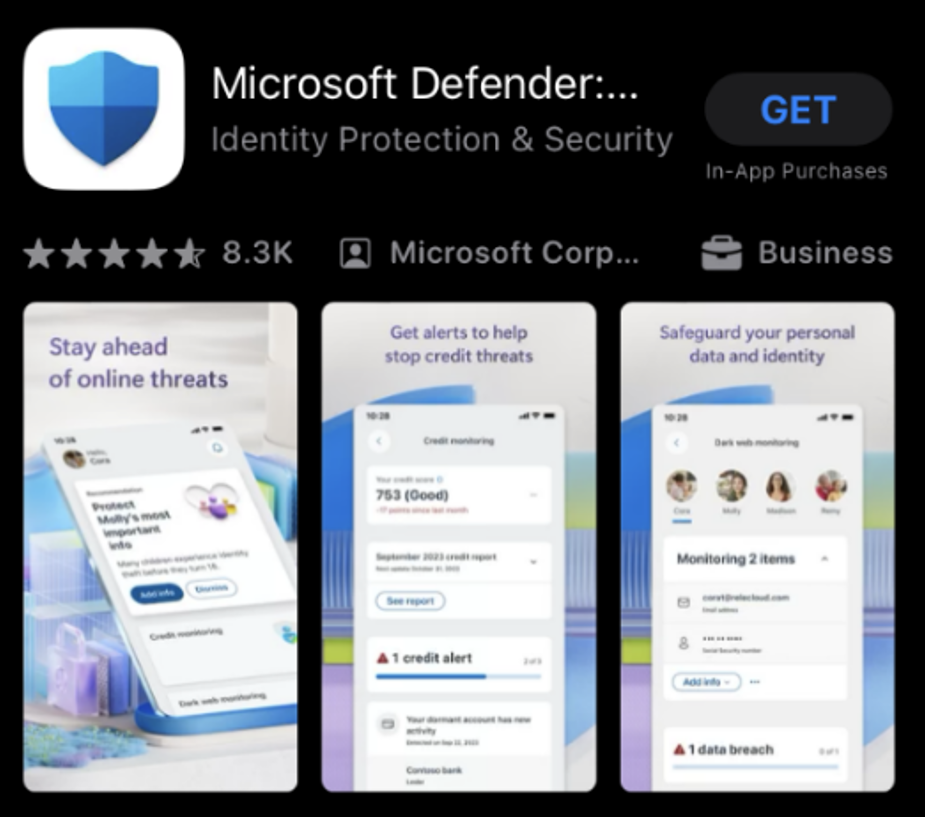
- Download Microsoft Defender onto your mobile device from the Apple App Store or Google Play Store.


- Once installed, you can log into the app by using your network account credentials.
- If you have any difficulties with accessing/activating protection, please contact the Helpdesk.
Using a Password Manager
The Helpdesk recommends you use a password manager to keep track of your account information. The default password managers in your web browser are not actually very secure; not to mention that your browser login is likely the first thing to be compromised in a theoretical data breach. Our recommendation is to use Bitwarden, which is free, high quality, and compatible across your devices.
Switching from your browser password manager(s) to Bitwarden is quick and simple. Instructions for this are at the bottom of the page. Take me there!
Setup
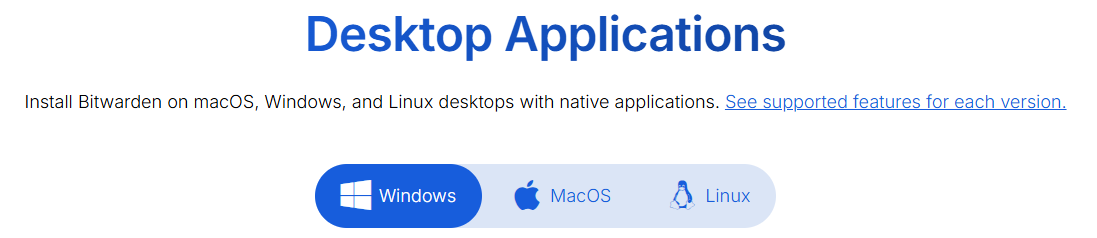
- Go to https://bitwarden.com/
- Click on the Downloads tab at the top of the page.

- Download and install the desired version of Bitwarden (we recommend you start with the desktop application). The available versions are:
- Browser extension—useful for auto-filling usernames and passwords online

- Desktop application—useful for filling in credentials in non-browser applications faster

- Bitwarden is also available as a mobile app for use on the go, as well as being viewable as a normal website.
- Browser extension—useful for auto-filling usernames and passwords online
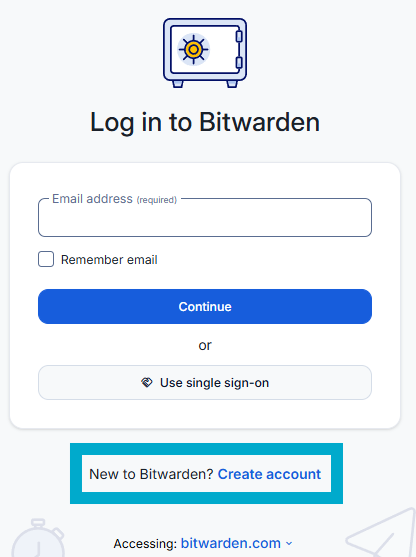
- Find and open the version of Bitwarden downloaded.
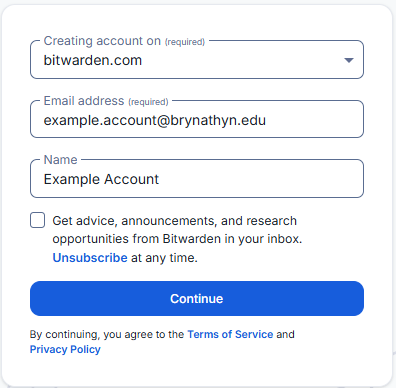
- Click on Create Account.

- Fill out the information on the screen and click Continue.

If you forget your master password, you will NOT be able to access your vault. Neither the Helpdesk nor Bitwarden support can help you get back into your account.
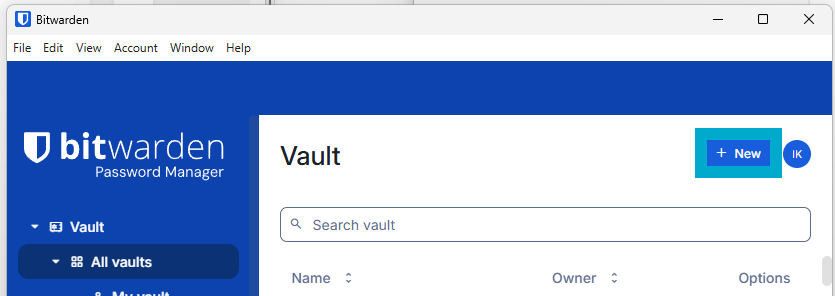
- You will now be able to log in on the main page.
- Once in, click + New to add a new login (desktop application pictured, however this should be evident on all platforms).

- Store various passwords by filling out the Name, Username, and Password fields.
- You can include the URL and any notes related to the account/log in.
- You will be able to either right click on the entries or select the clipboard icons next to them when you need to copy/paste your password over.
- You can also store things like debit or credit cards and use Bitwarden to securely auto-fill them in various websites or apps.
- Once you have, say, the desktop version installed, we recommend installing the browser extension and mobile app. Once you log in with the account you created, all of your passwords will appear and be accessible just like that.


There are also paid versions of Bitwarden that are available for both individual use and sharing either with one person or family. This can allow you to share passwords and access other premium features like MFA. More details can be found at this link: https://bitwarden.com/pricing/
Transferring your Passwords
Passwords saved in your browser can either be easily exported, then imported into Bitwarden; or even more easily imported straight from Bitwarden (depending on where you want to export them from). To do so:
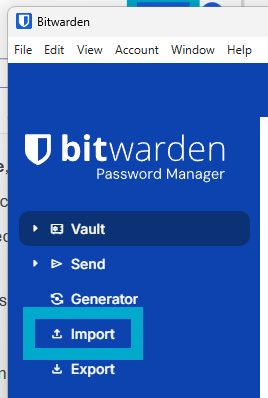
- In the Bitwarden desktop application, click the Import button on the left side of the main screen.

- This option should also be available in any version of Bitwarden (browser extension, mobile app, etc.), but instructions provided here are just for the desktop version.
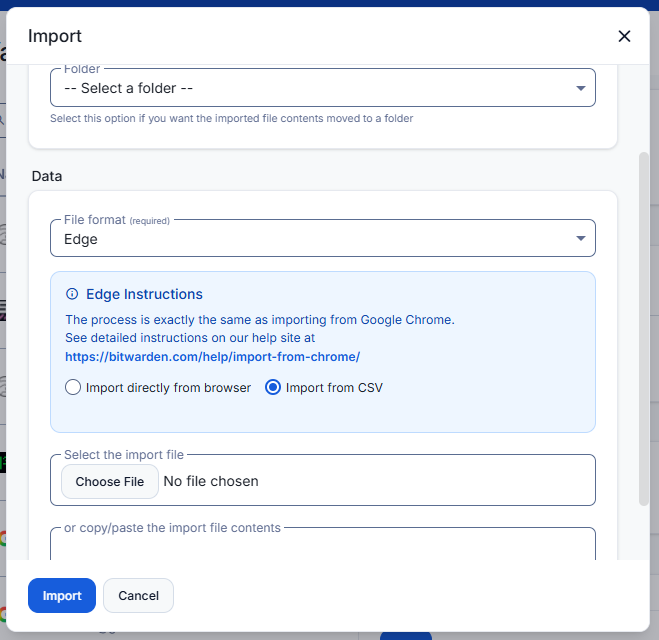
- Select a folder for passwords to be imported into if you have one prepared.
- Under File format, select the location of the passwords you exported from.

- Follow the instructions that appear for the location you selected.
- Click Import.
- If you have passwords stored in multiple browsers or accounts, repeat for each browser/account you have used.
Congratulations, your passwords are safely and conveniently stored in Bitwarden!
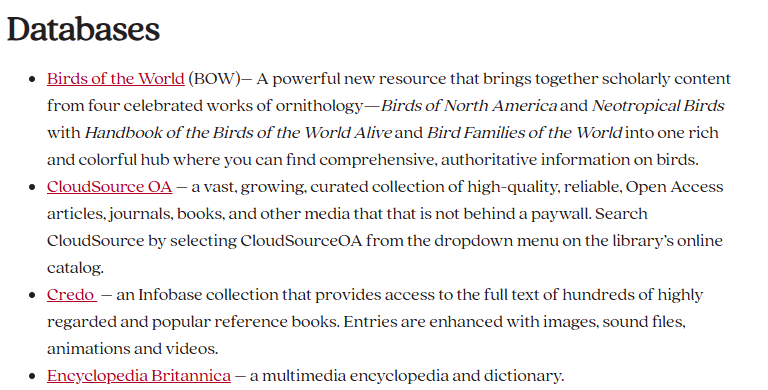
Accessing the Library's Electronic Resources
The Swedenborg Library subscribes to a number of electronic resources to support students, faculty and patrons in their research and education.
OCLC's EZProxy is a service that makes it simple for members of the Bryn Athyn College community to access the Swedenborg Library’s Electronic Resources.
- Go to the Swedenborg Library's Electronic Resources.
- Select one of the available databases.

- On the OCLC login screen, enter your campus username and password.
What is my Username and Password?

Once you log in, the session will stay open for 2 hours with no activity.
As long as you are active, the session will stay open.
Recovering Deleted Data
This document outlines how long data is recoverable from various services that the college uses, as well as how to retrieve data if it was unintentionally deleted.
Microsoft 365
- Currently there is no retention policy for data in Microsoft 365.
- Data of faculty and staff is backed up with 11:11 backup services on a 1-year retention period.
- If you lose data that is unrecoverable following the steps in this document, and it is within a year since you lost the data, contact the IT department to recover it for you.
OneDrive
Files deleted from your OneDrive are restorable in 3 stages over the course of approximately 3 months. See below for details.
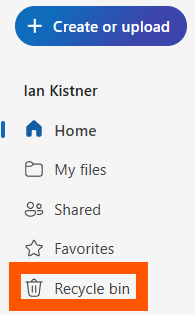
- Recycle Bin
- Deleted items are stored in the Recycle bin for up to 93 days.
- To access it:
- Go to the OneDrive website.
- Log in with your Microsoft account.
See Logging in with Microsoft 365 for more detailed instructions.
- On the left pane, click Recycle bin.

- After 93 days pass since they were added, files are deleted permanently.
- Second-stage Recycle Bin
- Items manually deleted from the Recycle bin are stored in the Second-stage recycle bin for the remainder of the 93 days.
- E.g. if a file is purged from the Recycle bin on day 3 since its deletion, it will still be in the Second-stage recycling bin for 90 days.
- To access it:
- Go to the main Recycle bin (see above).
- Scroll to the bottom of the page.
- Click the link to Second-stage recycle bin.

- After 93 days pass since they were originally deleted to the Recycle bin, files are deleted permanently.
- Items manually deleted from the Recycle bin are stored in the Second-stage recycle bin for the remainder of the 93 days.
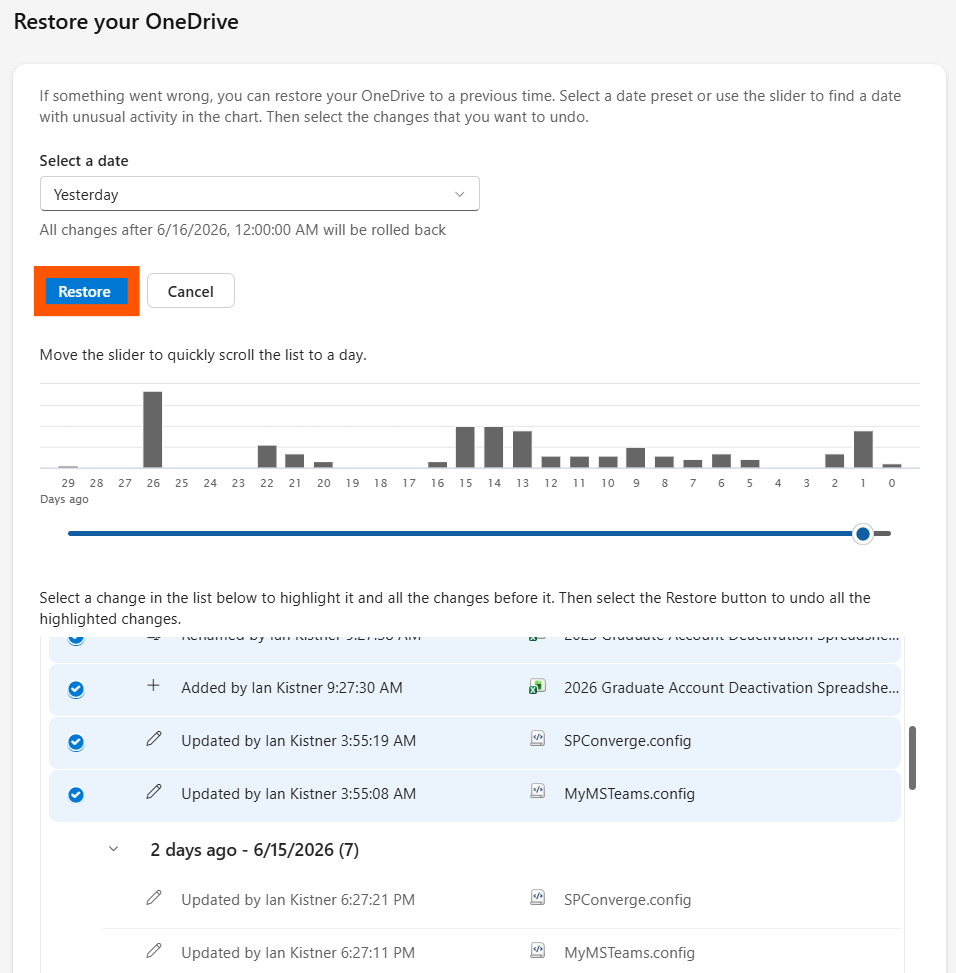
- Restoring
- Items deleted from the Second-stage recycle bin can be restored within the original 93 day window.
- E.g. if a file is purged from the Second-stage recycle bin on day 23 since its deletion, it will still be recoverable for 70 days.
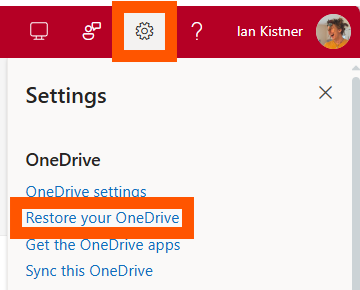
- To restore these files:
- Click on the gear icon in the top right corner of the screen.
- Click Restore your OneDrive.

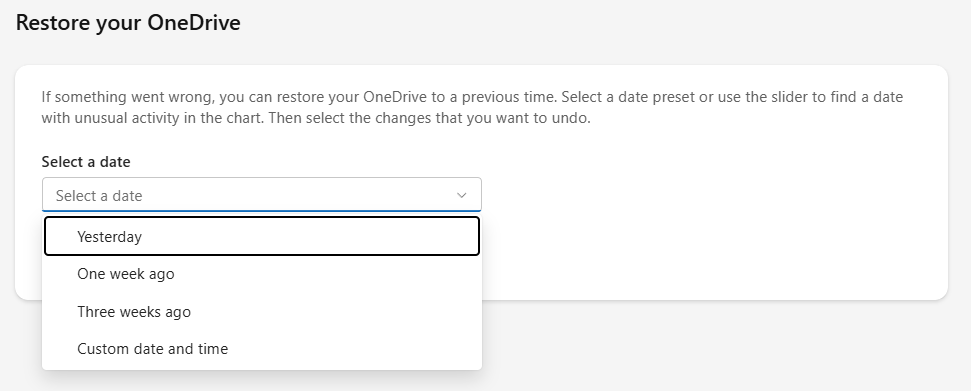
- Select a date to restore back to (one before the date you deleted the desired files).

- Select updates to keep/discard that occurred since the selected date.

- Click Restore to apply changes and restore your files.
- Items deleted from the Second-stage recycle bin can be restored within the original 93 day window.

If your Microsoft account gets deleted, all data from your OneDrive will remain recoverable by the Helpdesk for 365 days.
SharePoint
SharePoint retention has a similar 93-day retention period to OneDrive, just without the Second-stage recycle bin.
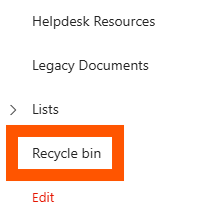
- Deleting a file in SharePoint moves it to the Recycle bin.
- The Recycle bin is viewable in the left pane of any SharePoint site online.

- Deleted files will remain there for the duration of the 93 days unless purged from the Recycle bin manually.
- The Recycle bin is viewable in the left pane of any SharePoint site online.
- If a file is purged, it is still recoverable for the remainder of the retention period.
Contact the Helpdesk to recover purged files.
After 93 days are up, any deleted files will no longer be recoverable.
Outlook (Exchange)
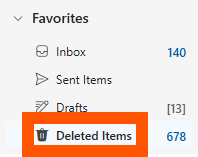
- Deleted items in Outlook will be sent to your Deleted Items folder, where they will stay indefinitely.

- To recover items from the Deleted Items folder:
- Select an email.
- Drag it to your Inbox or any other desired folder.

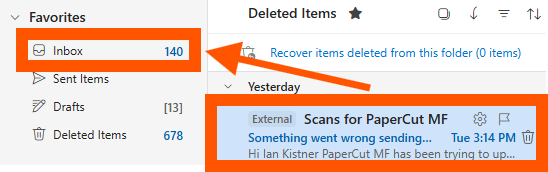
- Items purged from the deleted items folder it will be retrievable for 30 more days.
- To recover items this way:
- Navigate to the Deleted Items folder.
- Click Recover items deleted from this folder.
- Right click on the item you want to restore, then click Restore.
- This will put the item back in your Deleted Items folder.
- Drag it out to the desired folder.
Moodle
- Moodle runs daily backups that are kept for 1 month.
- Recycle Bin:
- This is used to restore courses or other deleted items.
- The Recycle bin is set to store data for 6 months before deleting it.
Blackbaud Hosted Solutions (RE & FE)
- Backups are fully handled by Blackbaud. Their policy document is linked below.
- A sign-in may be required to view the page: https://community.blackbaud.com/blogs/64/1250
Vonage Support Resources
This page contains a handful of resources you can use to troubleshoot issues you may be having with the Vonage application or Yealink hardphones. You can also look through the attached documentation if you want to know how to set up specific functionality, such as a voicemail message.
Customer Care info from Vonage
- Training Center: View tutorials and get Quick Start and User Guides.
- Support Site: Our knowledge base houses the topics we discussed today and much more on all of the features and services available to you. Just search or navigate to the topic you need.
- Vonage System Status: Vonage system status and information.
- Vee, Chat, and Submit a Case: Ask Vee (our chatbot) questions and get the answers you need. Vee also directs you to Chat with Us or Open a Case if unable to return an answer.
- Vonage Business Cloud Community: Ask questions, share ideas with other customers and get answers to frequently asked questions.
- Call Us: If your inquiry requires a conversation, contact our Customer Care and Technical Support teams: (866) 901-0242
Vonage support requires you to provide an account number to receive support. The BAC Account Number is 315013.