Direct printing
Faculty and Staff can connect to the copiers directly. The instructions for doing so on Windows and MacOS are below.
Windows
This process will install the universal UD3 PCL6 drivers. For copier-specific drivers, please contact the Helpdesk.
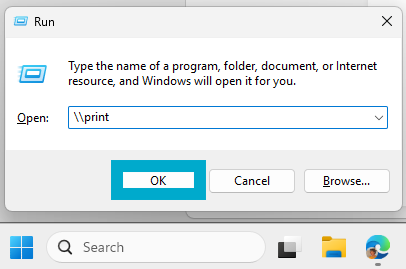
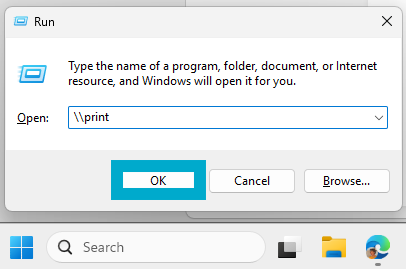
- Right click the Start Menu icon on the bottom of your screen and click Run.
- Alternatively, use
Win+R. - The Run dialog box will appear in the bottom left.
- Alternatively, use
- Type
\\printand then click OK.If prompted for credentials, use your campus username and password.
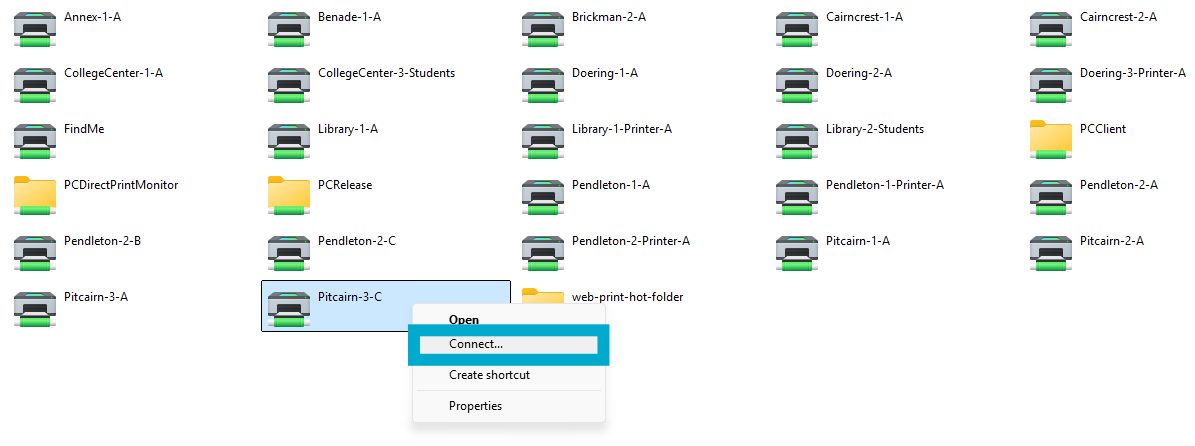
What is my Username and Password? - Find the printer you’d like to connect to in the window that appears, then right click on it and click Connect…
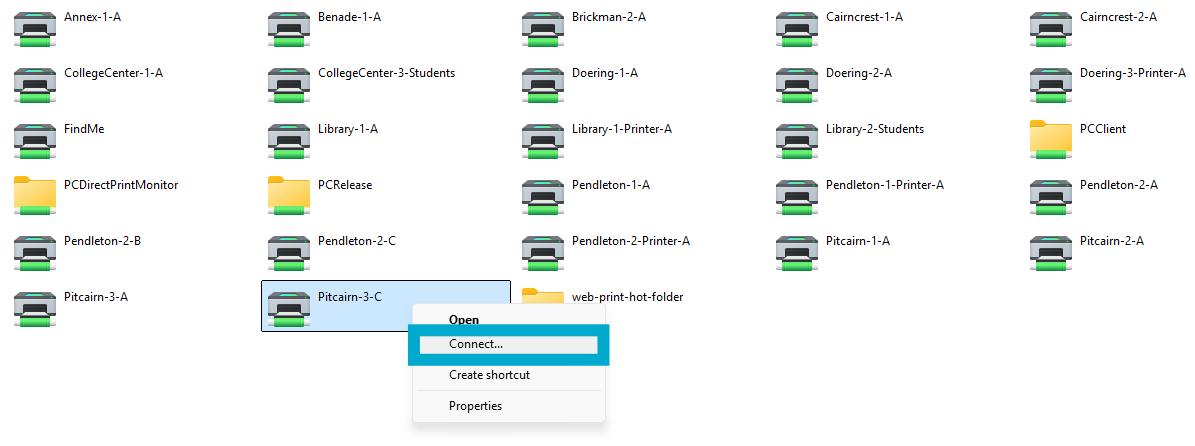
- The printer should connect and automatically install the appropriate drivers.
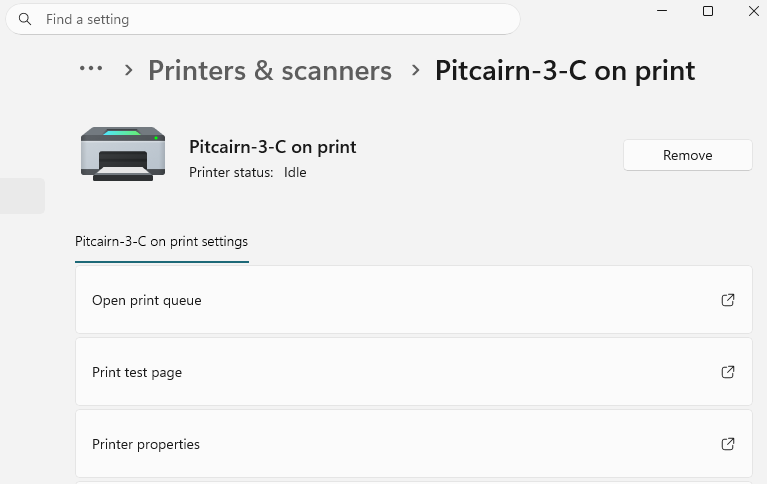
- Check that the printer is set up correctly by:
- Going to Settings > Bluetooth & devices > Printers & scanners and looking for the chosen copier.
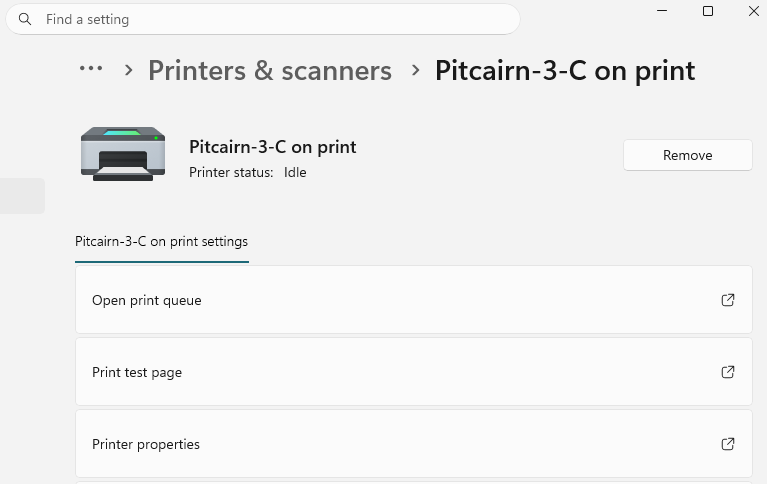
- Doing a test print from software like Notepad, Word, etc.
- Going to Settings > Bluetooth & devices > Printers & scanners and looking for the chosen copier.
macOS
- Find the copier you'd like to print to from the list below. Click the model number to download the driver.
Name
Model
Location
Brickman-2-A
Admissions 2nd floor
Doering-2-A
2nd floor
Pendleton-2-B
Theological school
Pendleton-2-C
College office
Library-1-A
Archives
CollegeCenter-3-Students
3rd floor
Pendleton-1-A
1st floor
Pendleton-2-A
Mail room
Doering-1-A
1st floor
Library-2-Students
Front desk
CollegeCenter-1-A
Health center
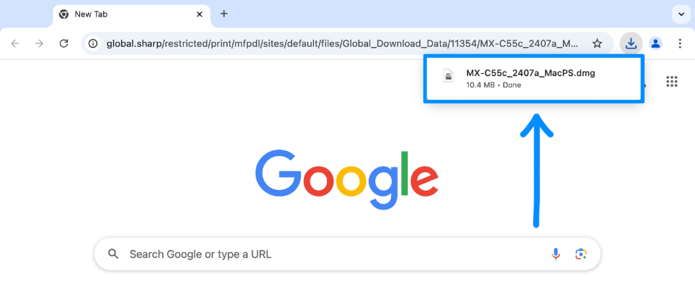
- After it downloads, click on it to begin the installation by opening the .dmg file.
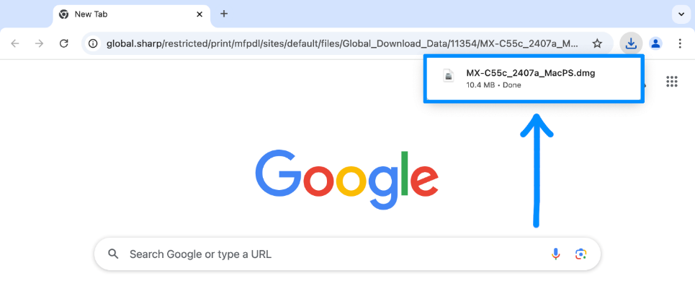
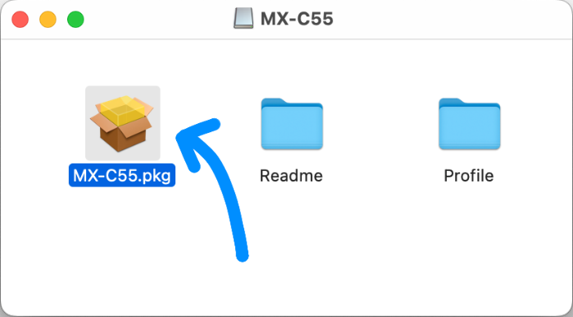
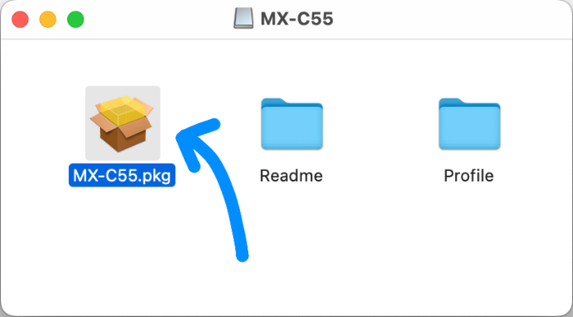
- Double-click the installer package to begin the installation.
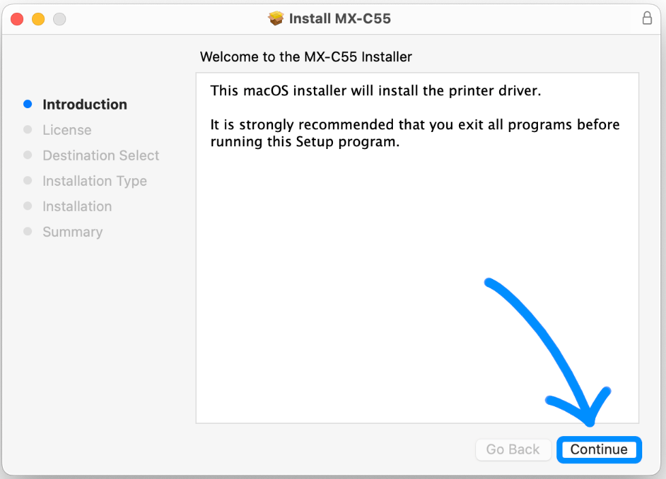
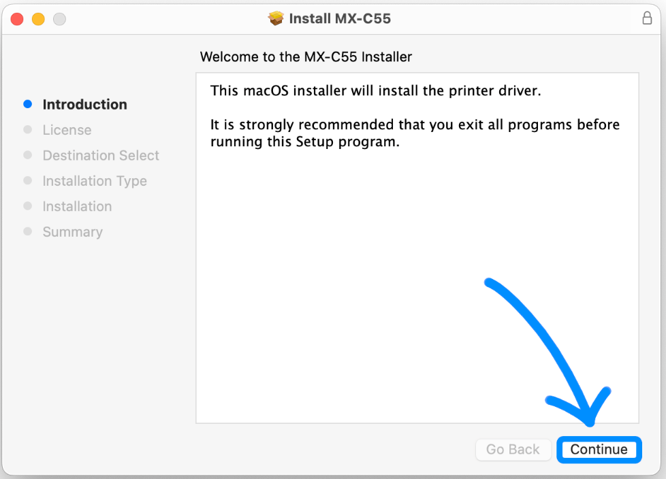
- Click Continue and follow the prompts.
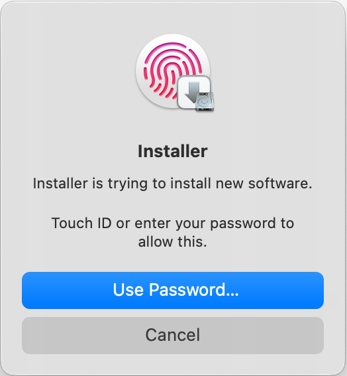
- Make sure to authenticate when prompted.
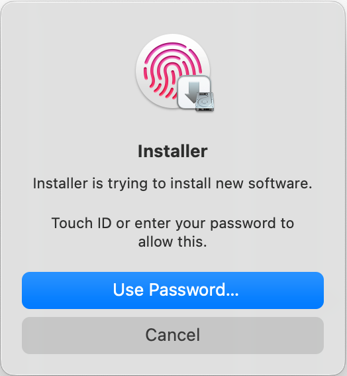
- Make sure to authenticate when prompted.
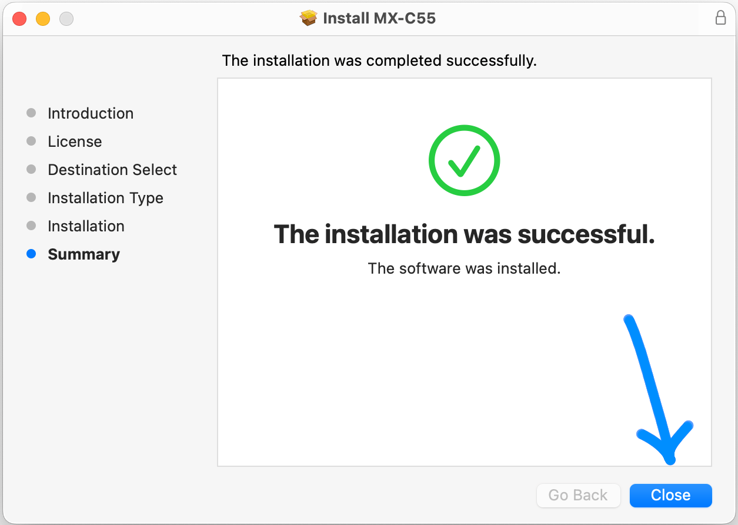
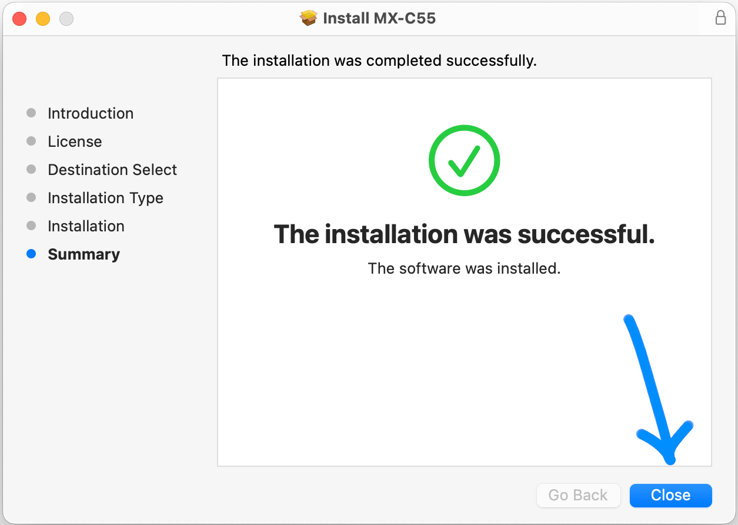
- When the installation has finished, close the installer.
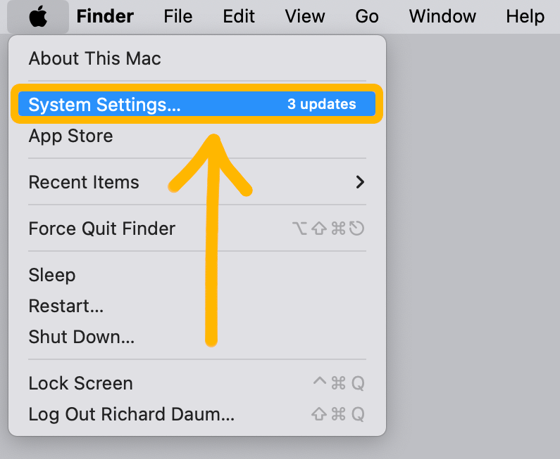
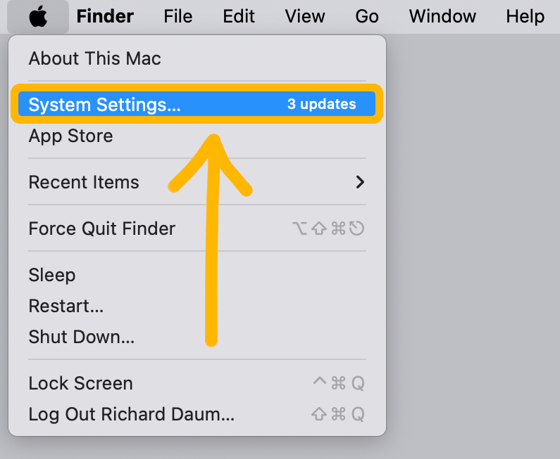
- Click the Apple icon in the top left, then click System Settings…
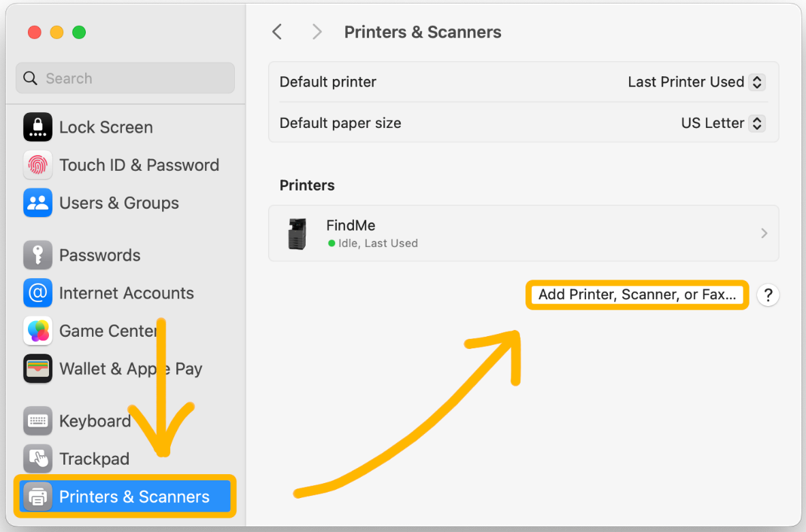
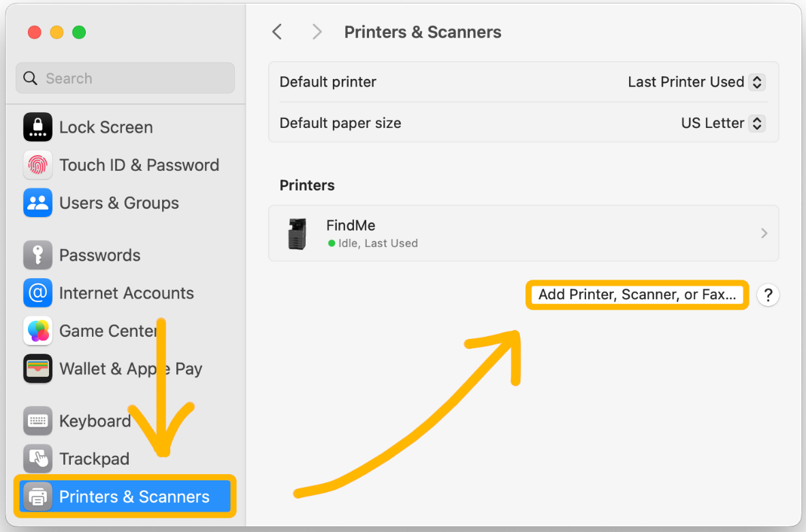
- Click Printers & Scanners from the sidebar. Then click Add Printer, Scanner, or Fax…
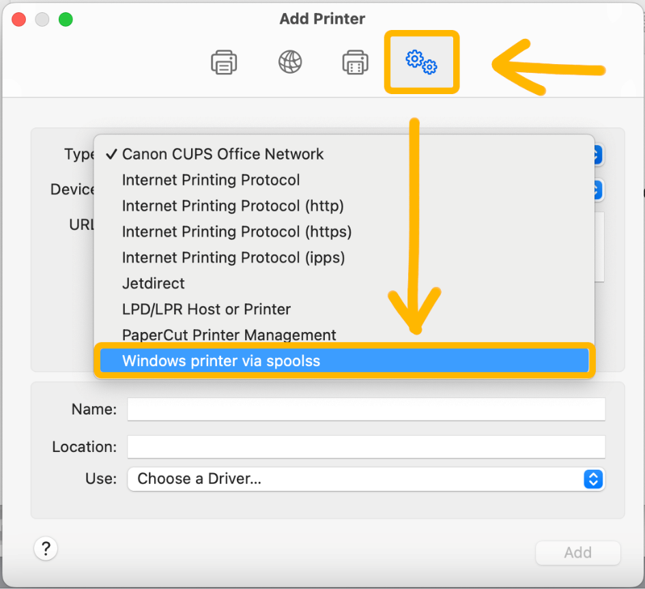
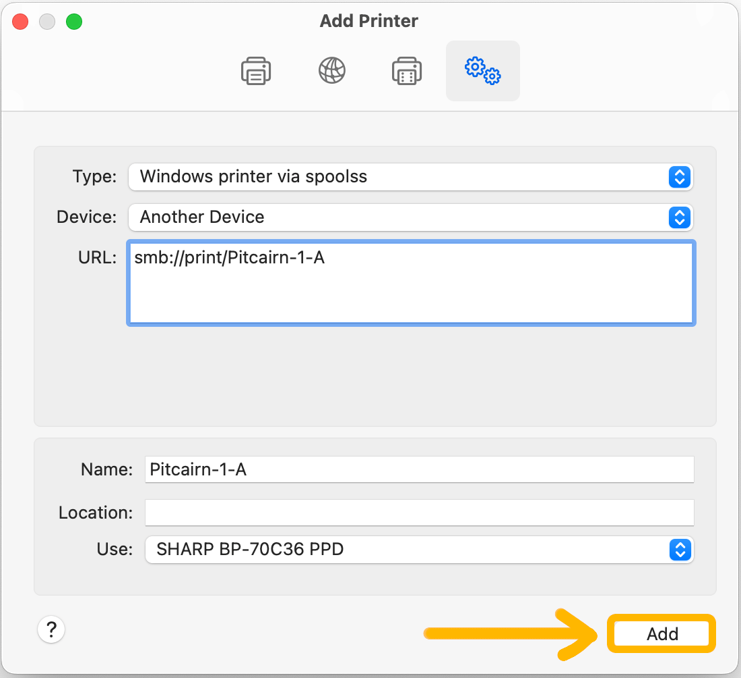
- Click the Advanced icon (gears) and then click the Type drop-down menu and select Windows printer via spoolss.
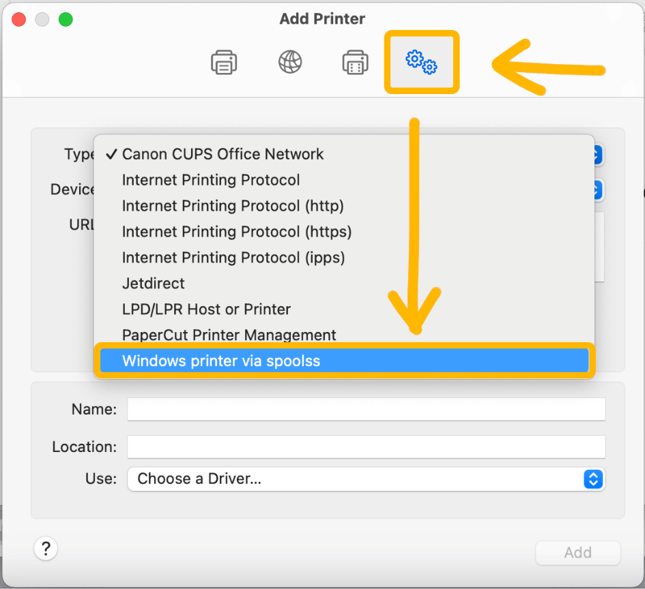
If the Advanced icon does not appear, right click on the toolbar at the top near the icons, click Customize Toolbar… then drag the Advanced icon from the pop-up window onto the toolbar. Click Done.
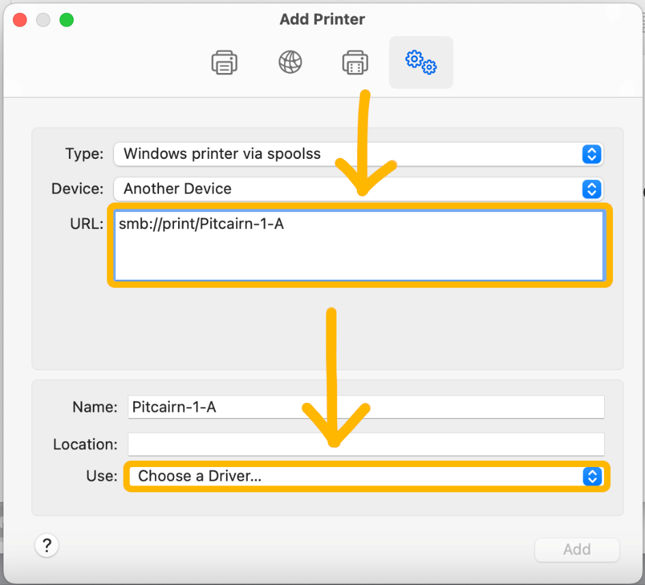
- In the URL: box, enter
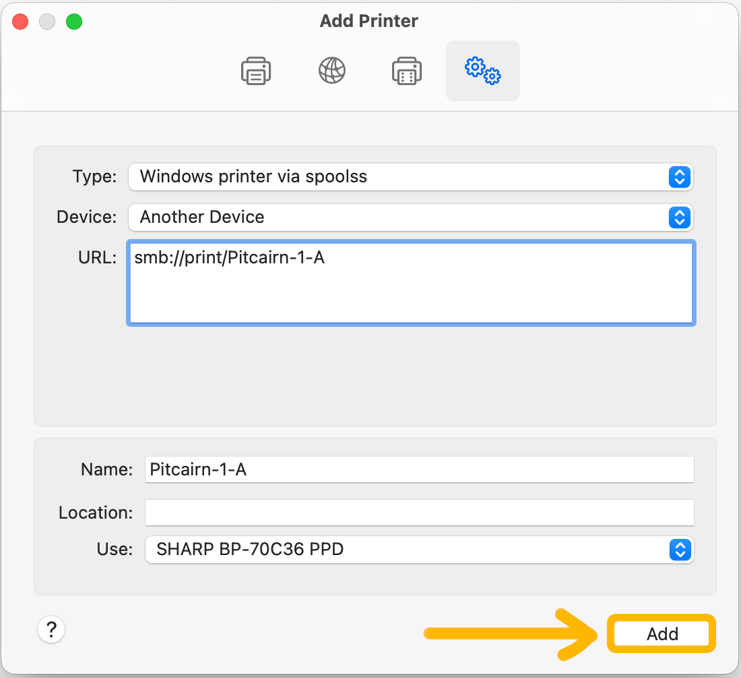
smb://print/and then the name of the printer (e.g.smb://print/Pitcairn-1-A).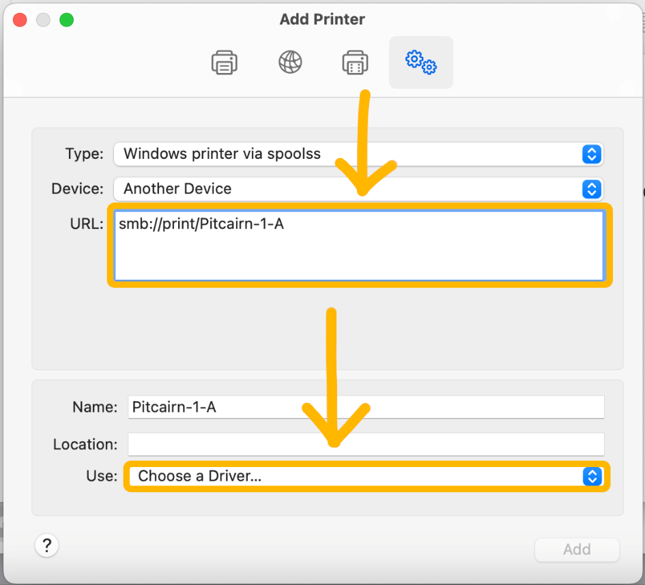
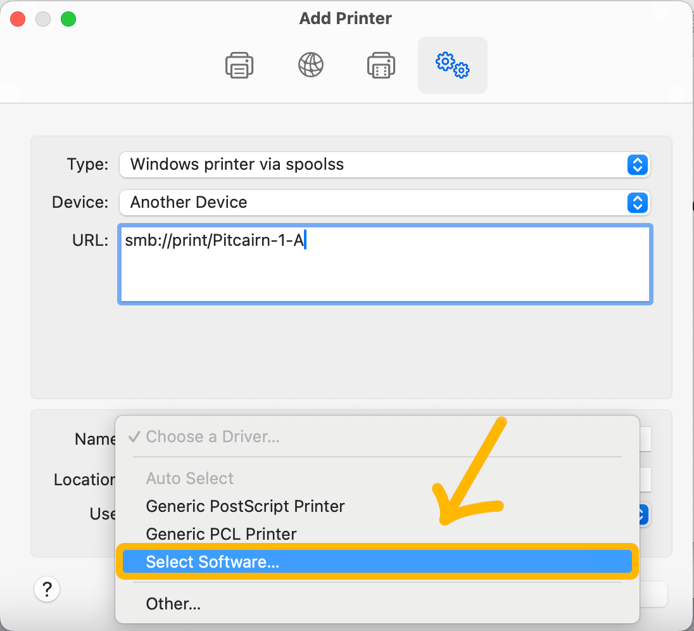
- On the Use: drop-down menu, select Choose a Driver…
- See the table below for complete list of names:
Name
Model
Location
Brickman-2-A
Admissions 2nd floor
Doering-2-A
2nd floor
Pendleton-2-B
Theological school
Pendleton-2-C
College office
Library-1-A
Archives
CollegeCenter-3-Students
3rd floor
Pendleton-1-A
1st floor
Pendleton-2-A
Mail room
Doering-1-A
1st floor
Library-2-Students
Front desk
CollegeCenter-1-A
Health center
- See the table below for complete list of names:
- Click Select Software…
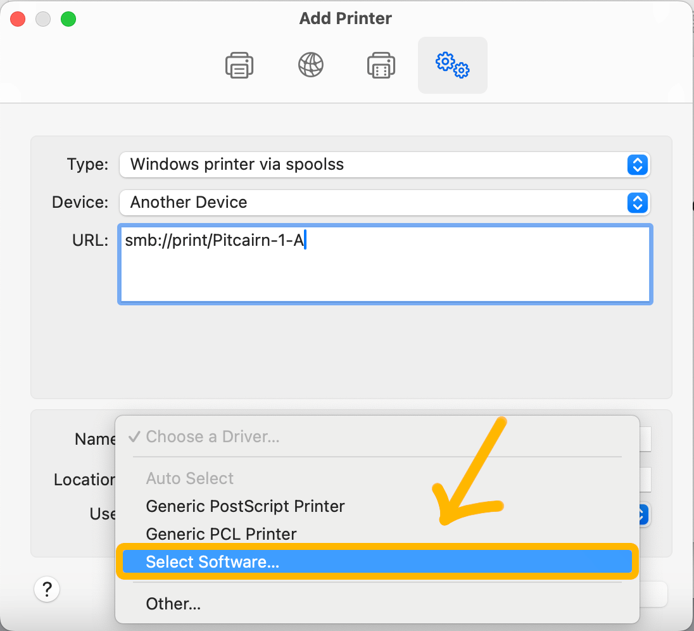
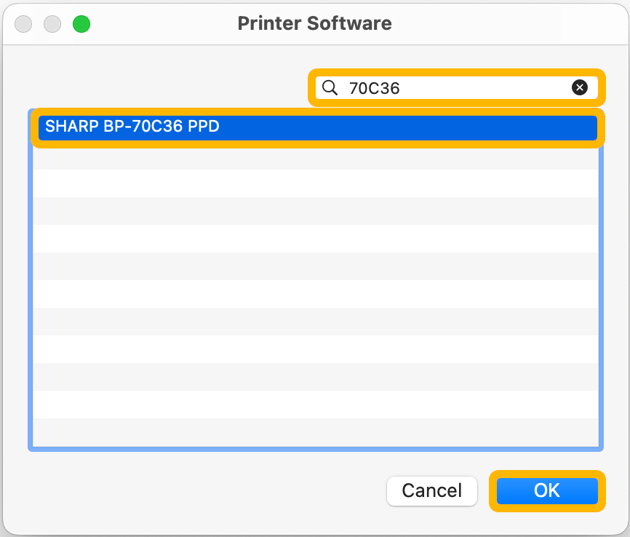
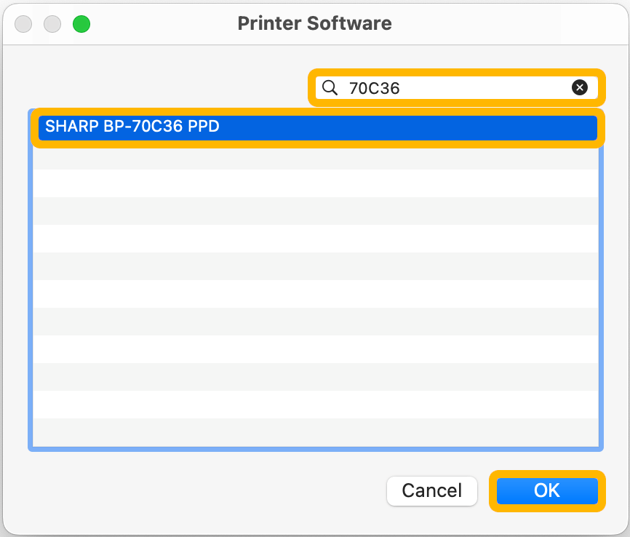
- Search for the model of printer you’d like to add (see table above), then select the driver and click OK.
- Click Add.
- When you first direct connect to a printer, it will prompt you for your network credentials. It is important that you include
anc\at the beginning, e.g.anc\<network username>
If you don't remember what to enter here, see What is my Username and Password?
- When you first direct connect to a printer, it will prompt you for your network credentials. It is important that you include
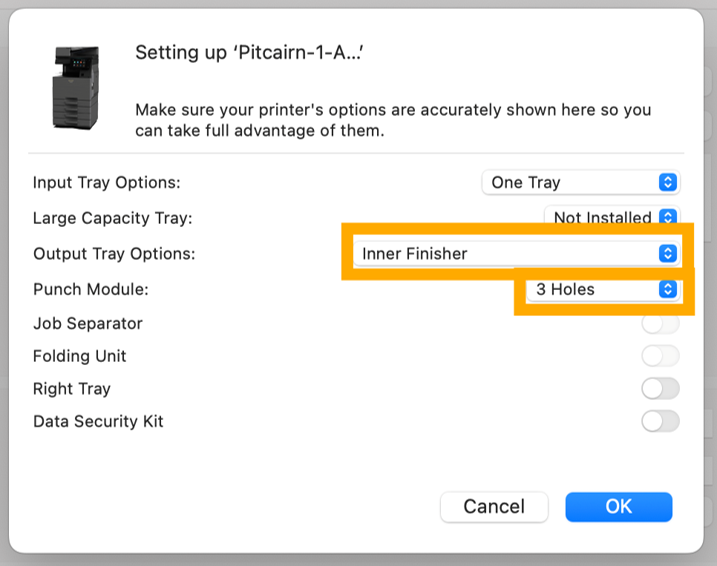
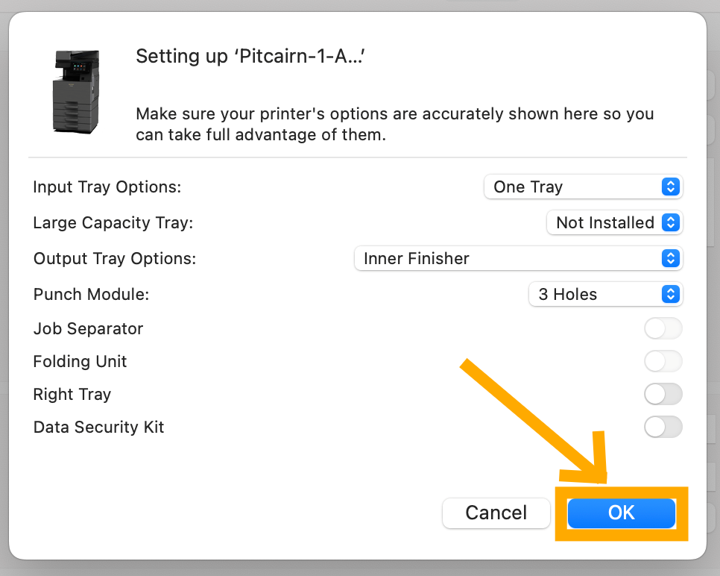
- To set up punching and stapling, change Output Tray Options: to Inner Finisher and Punch Module to 3 Holes if the options appear. Otherwise, leave the default settings.
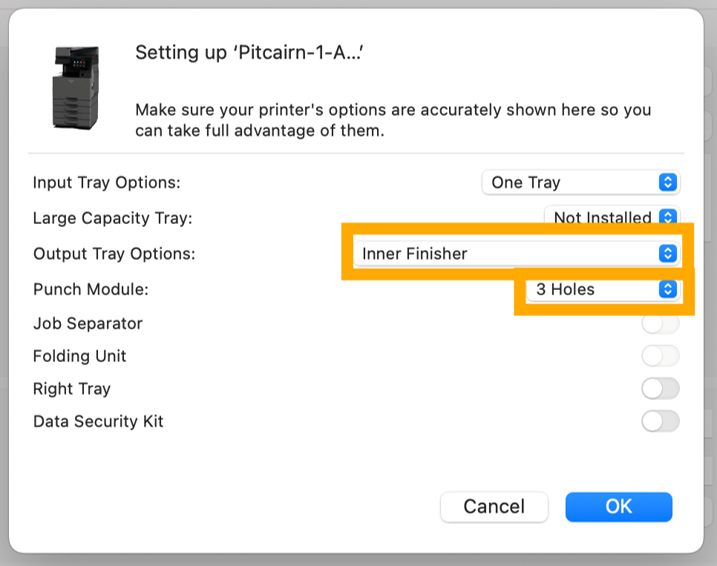
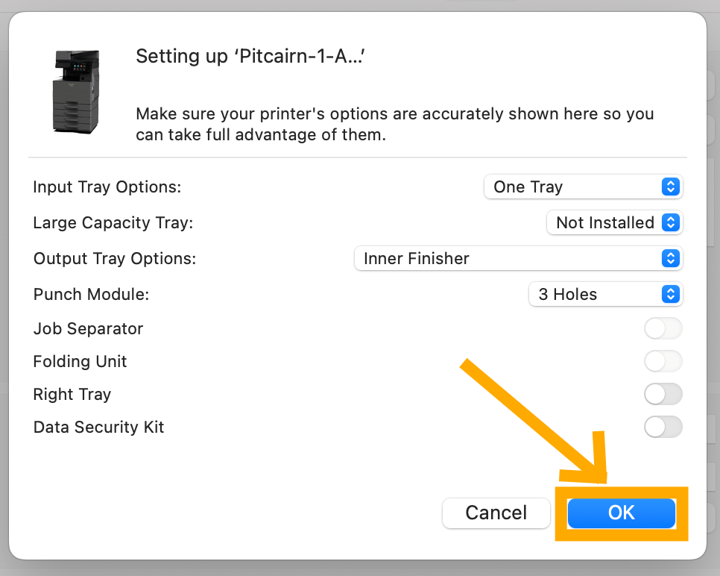
- Click OK on the setup pop-up box.
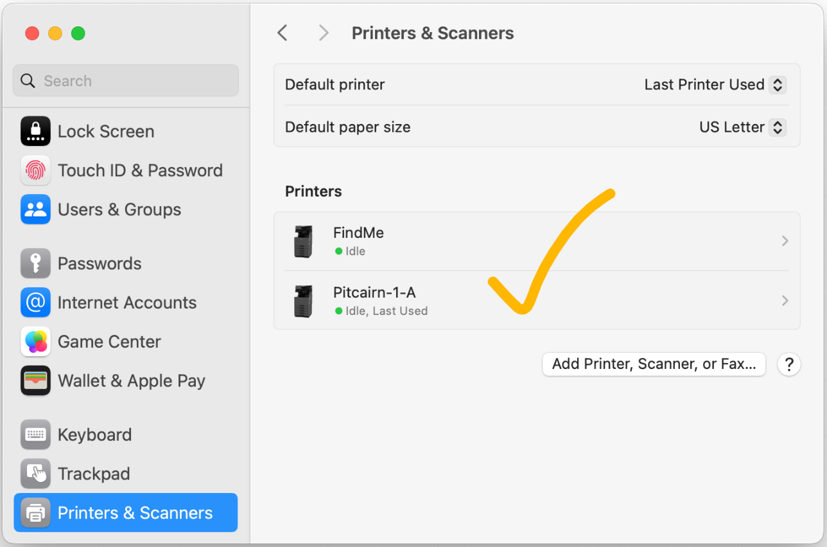
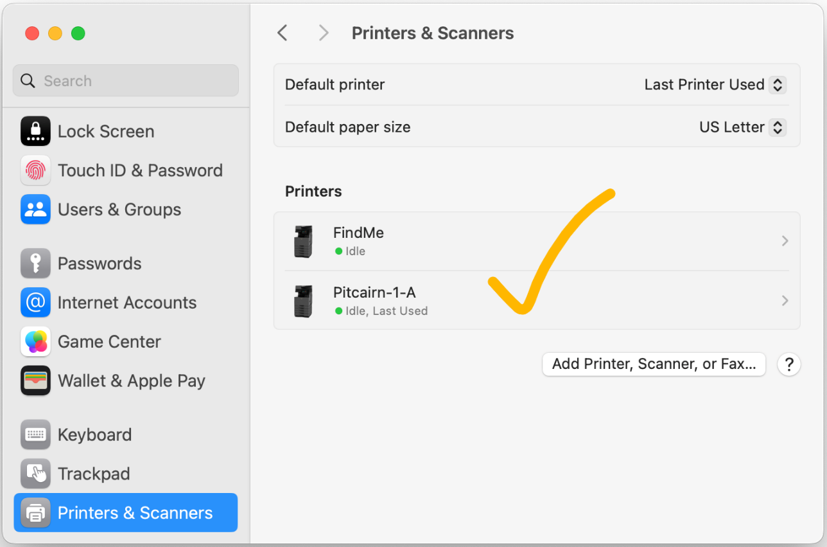
- You can confirm the printer has been added by going back to Printers & Scanners.
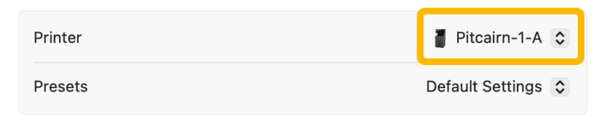
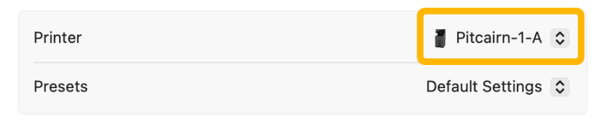
- Make sure to select the preferred printer from the Printer drop-down menu when printing your next document.